TACC Analysis Portal
The TACC Analysis Portal (TAP) is a web-based portal that provides access to interactive sessions on TACC HPC systems. TAP-supported applications include Desktop Cloud Visualization (DCV) remote desktop, Jupyter Notebooks, and RStudio. Any user with an allocation on one of TACC’s HPC systems can log in to TAP and use the services. Over the course of this workshop, we will be using TAP to launch Jupyter Notebooks and DCV remote desktop sessions as a convenient way to interatively write/run Python code and build/train machine learning models. By the end of this section, you should be able to:
Log in to the TACC Analysis Portal
Submit a Jupyter Notebook job to a TACC system
Connect to a Jupyter Notebook session
Choose the correct Jupyter kernel
Run simple Python code in a Jupyter Notebook
Accessing the Portal
Log in to TAP using the same username and password that you use to access the TACC User Portal. Once you’ve logged in you’ll be directed to the Home Screen where you can begin scheduling jobs.
Job Management
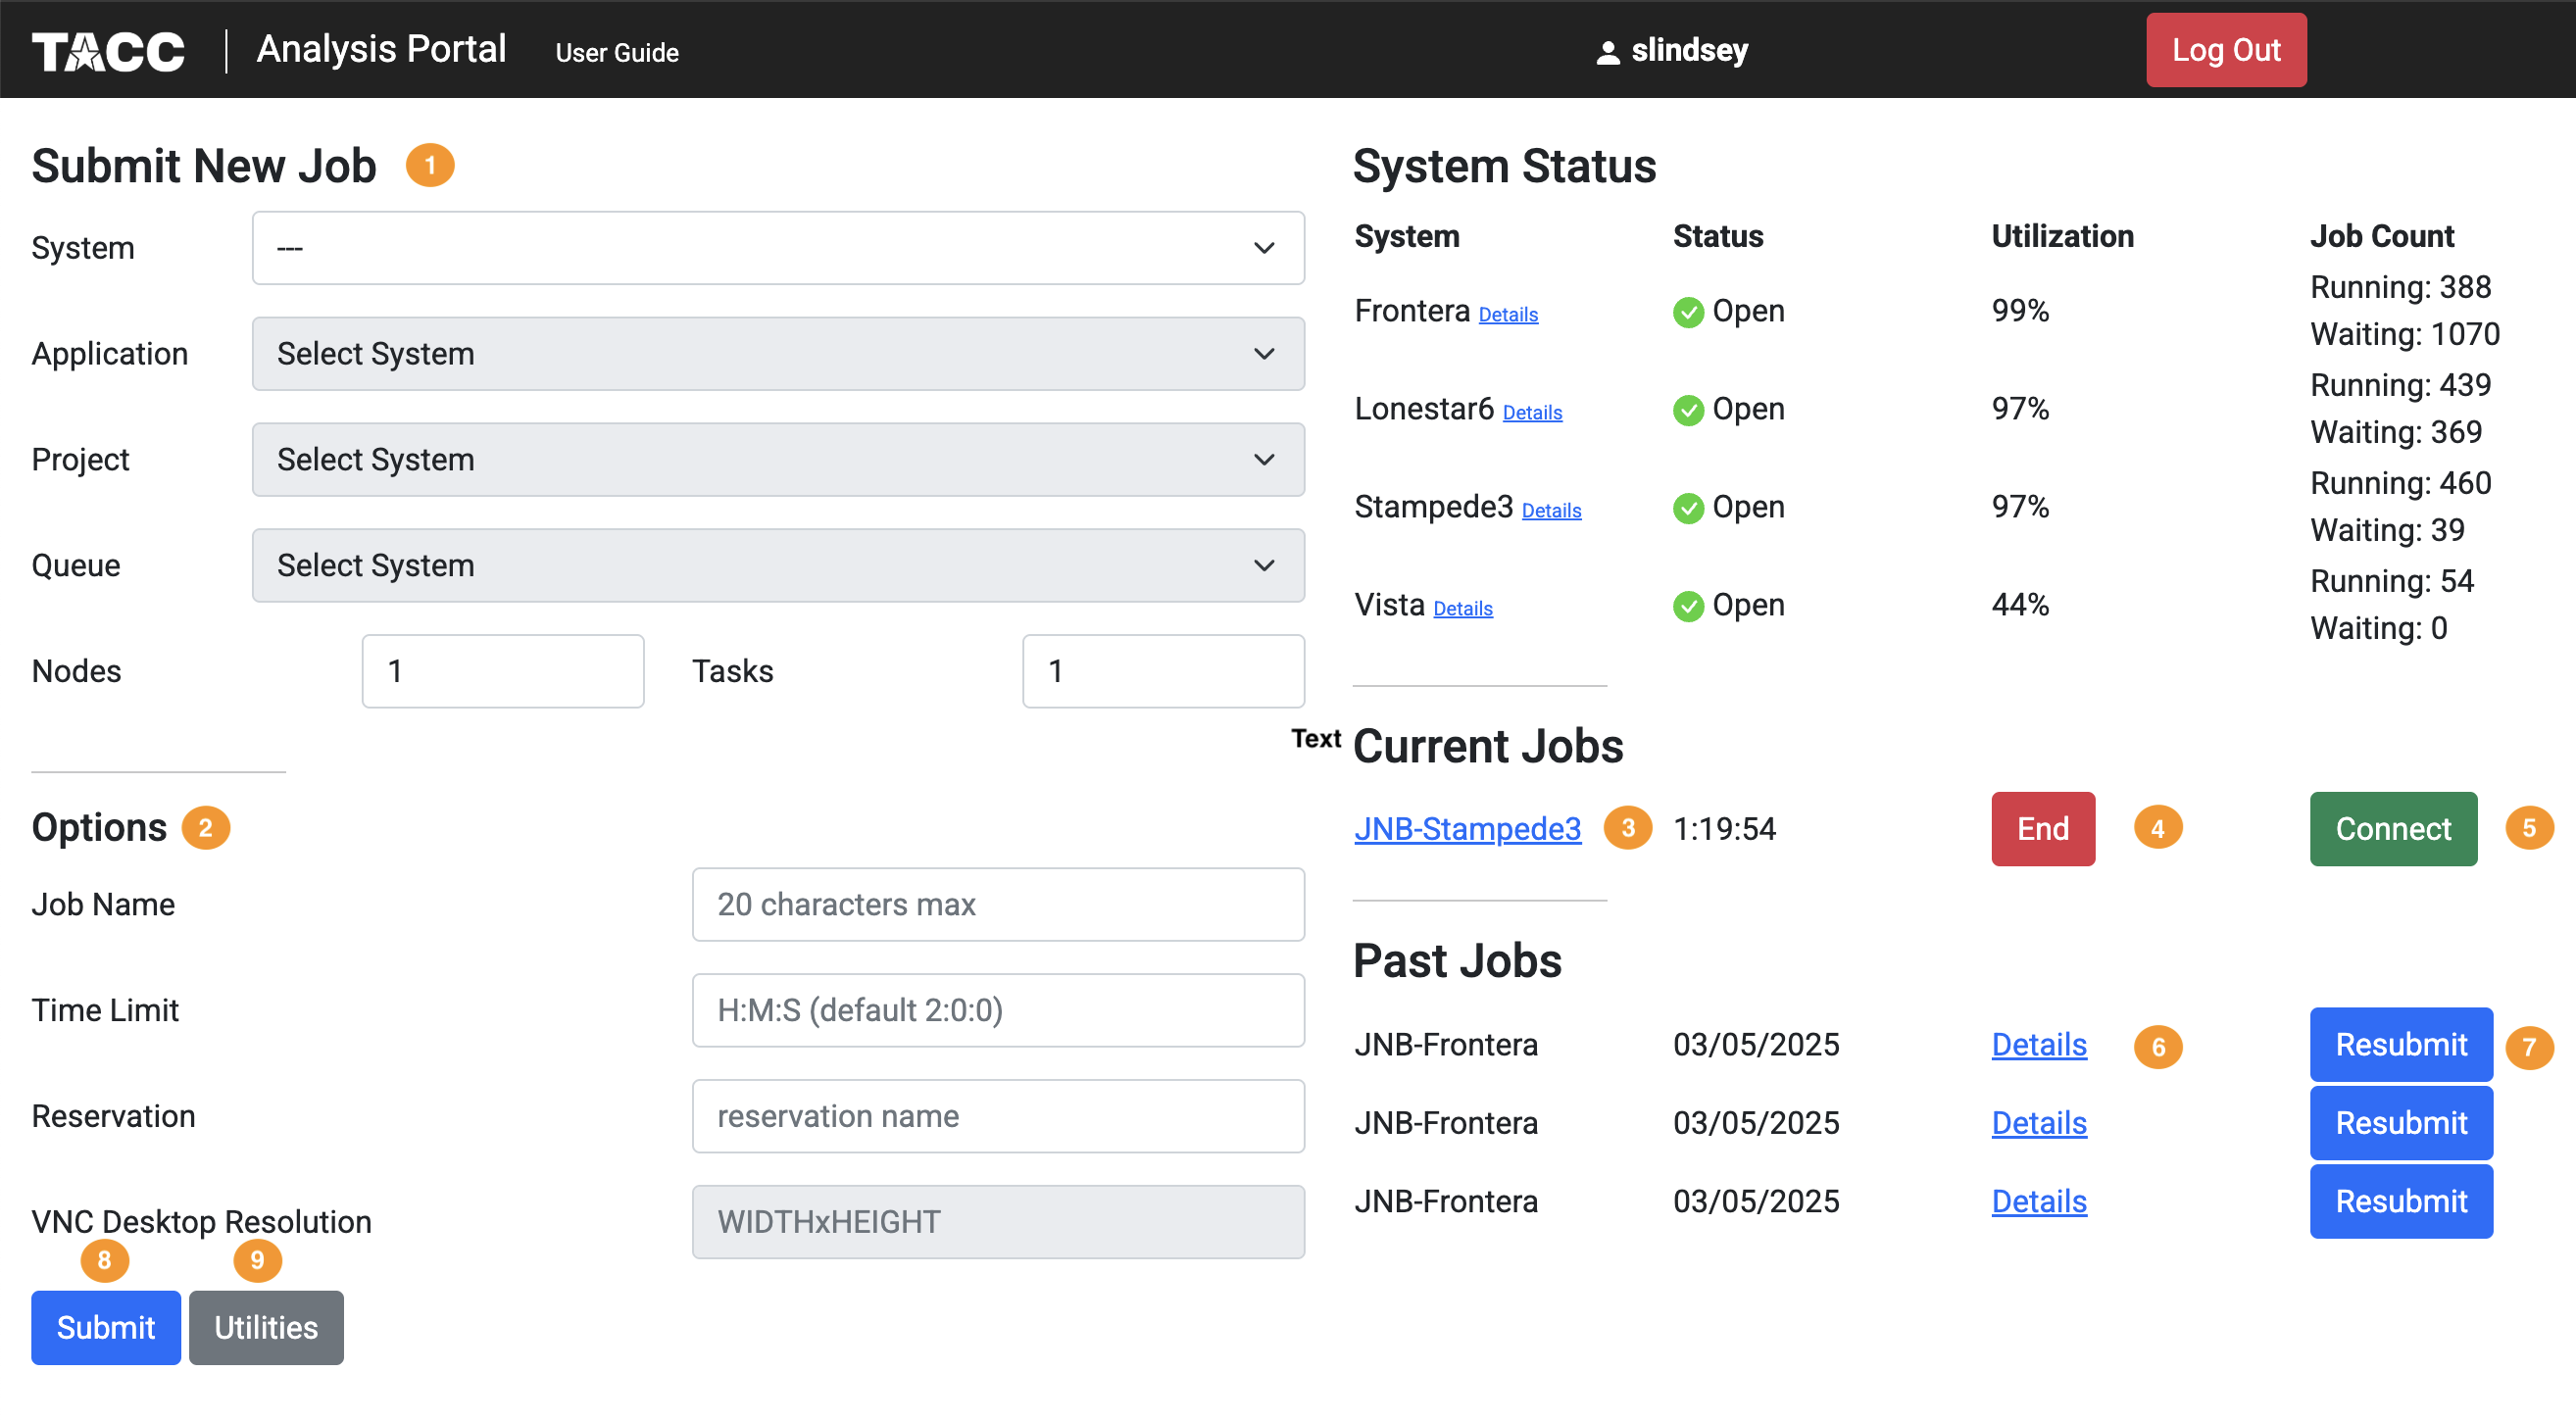
Submitting a Job
Submitting a job on TAP requires the following inputs: ( 1 )System: where the job will run. The system selector drop-down will contain the TAP-supported TACC systems where you have an allocation. The system must be selected first, as the values of the other selectors are determined by the selected system.
Application: which application the job will run. The application selector will contain the applications available on the selected system (DCV, VNC, Jupyter, or RStudio)
Project: which project allocation to bill for the job run. The project selector will contain the projects associated with your account on the selected system.
Queue: which system queue will receive the job. The queue selector will contain the TAP-supported queues on the selected system.
Nodes: the number of nodes the job will occupy. We recommend leaving this setting at 1 unless you know you need more nodes. This is equivalent to the -N option in SLURM.
Tasks: the number of MPI tasks the job will use. We recommend leaving this setting at 1 unless you know you need more tasks. This is equivalent to the -n option in SLURM.
Time Limit: how long the job will run. If left blank, the job will use the TAP default runtime of 2 hours.
Reservation: the reservation in which to run the job. If you have a reservation on the selected system and want the job to run within that reservation, specify the name here.
VNC Desktop Resolution: desktop resolution for a VNC job. If this is left blank, a VNC job will use the default resolution of 1024x768.
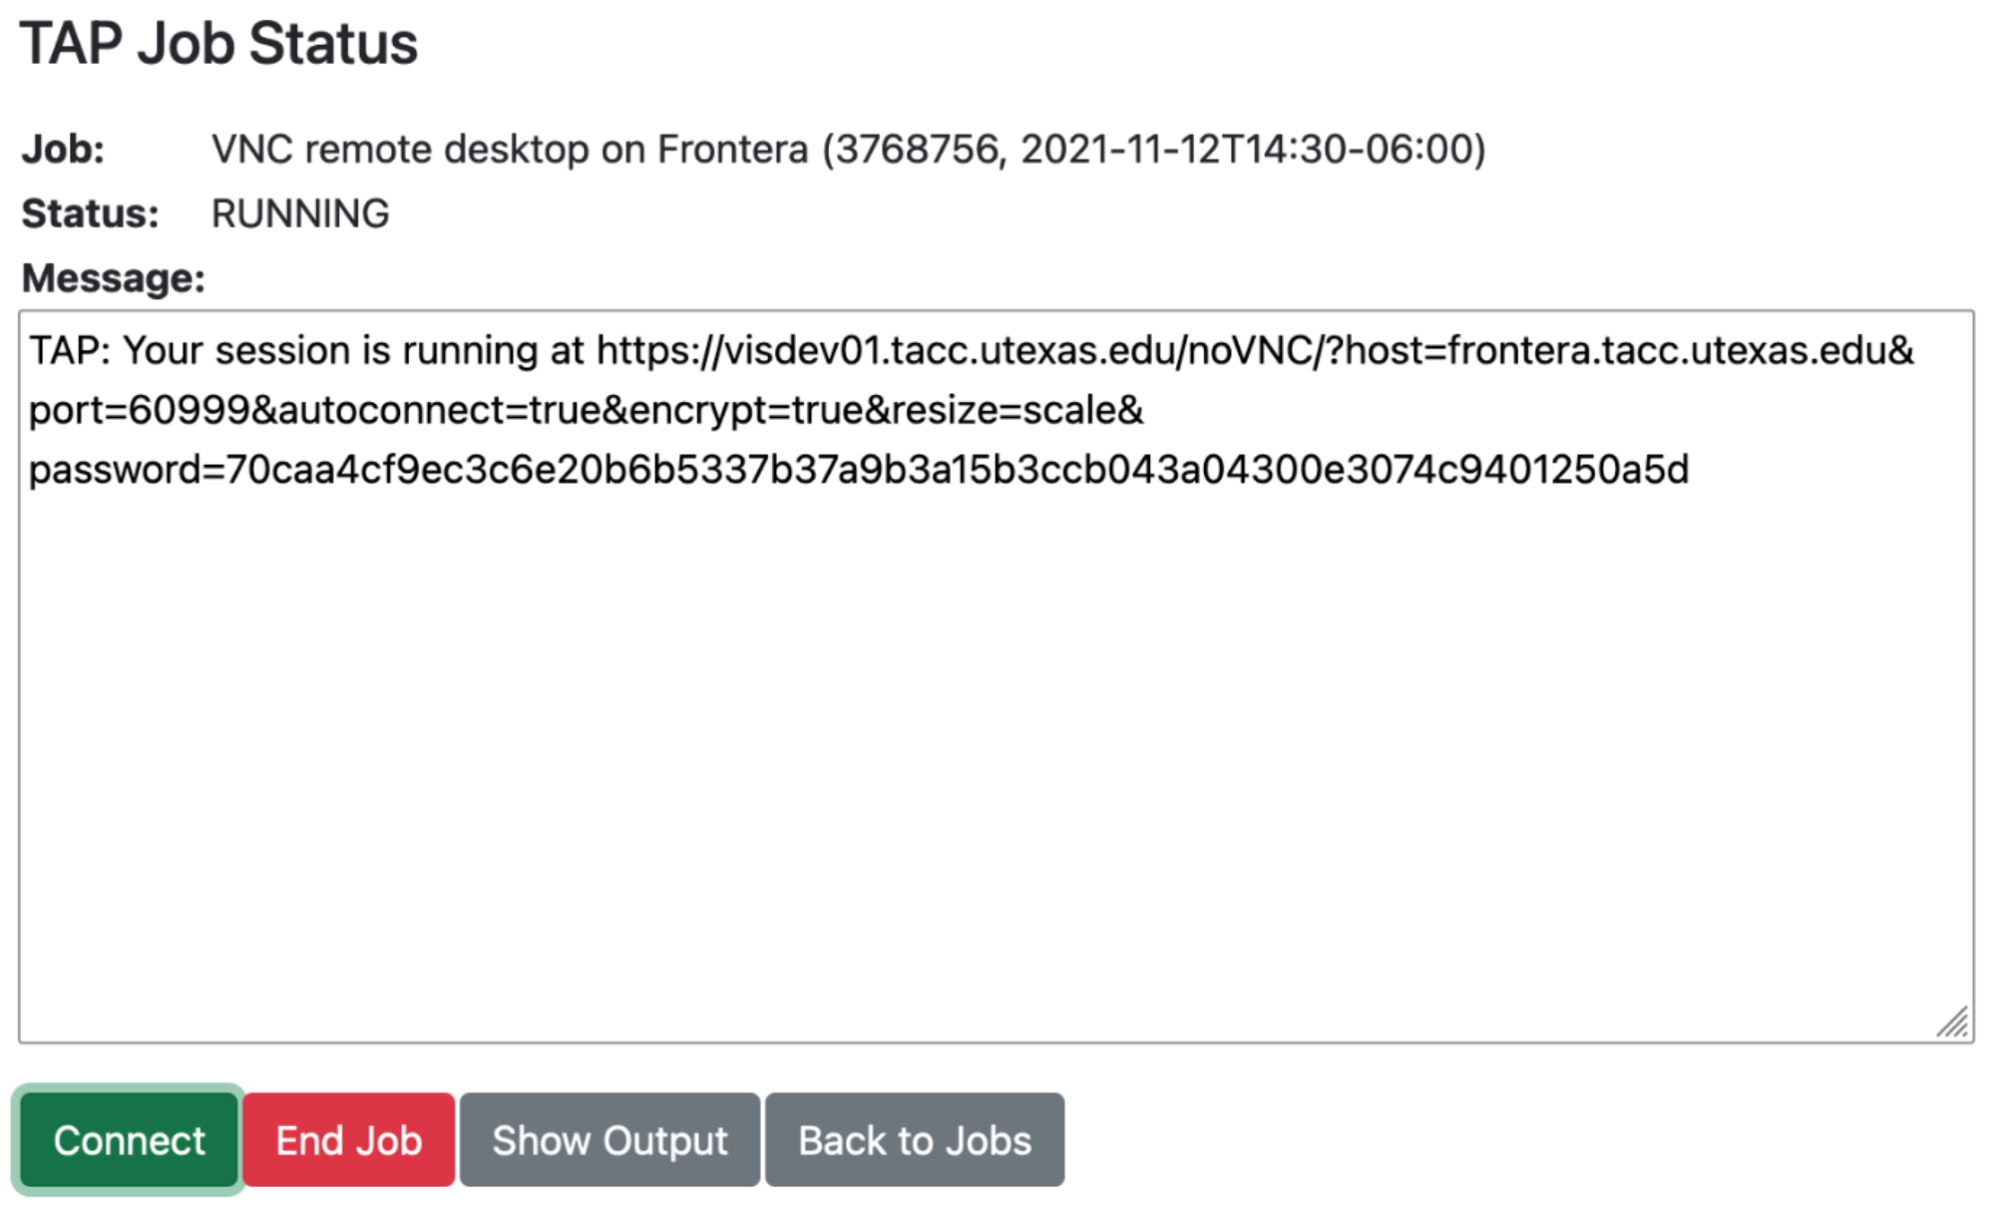
Click the “Check Status” button to update the page with the latest job status. The diagnostic information will include an estimated start time for the job if Slurm is able to provide one. Jobs submitted to development queues typically start running more quickly than jobs submitted to other queues.
Ending a Submitted Job
When you are finished with your job, you can end your job using the End ( 4 ) button on the TAP Home Screen page or on the Job Status page. Note that closing the browser window will not end the job. Also note that if you end the job from within the application (for example, pressing "Enter" in the red xterm in a DCV or VNC job), TAP will still show the job as running until you check status for the job, click "End Job" within TAP, or the requested end time of the job is reached.Resubmitting a Past Job
You can resubmit a past job using the Resubmit ( 7 ) button from the Home Screen page. The job will be submitted with the same inputs used for the past job, including any optional inputs. Select Details ( 6 ) to see the inputs that were specified for the past job.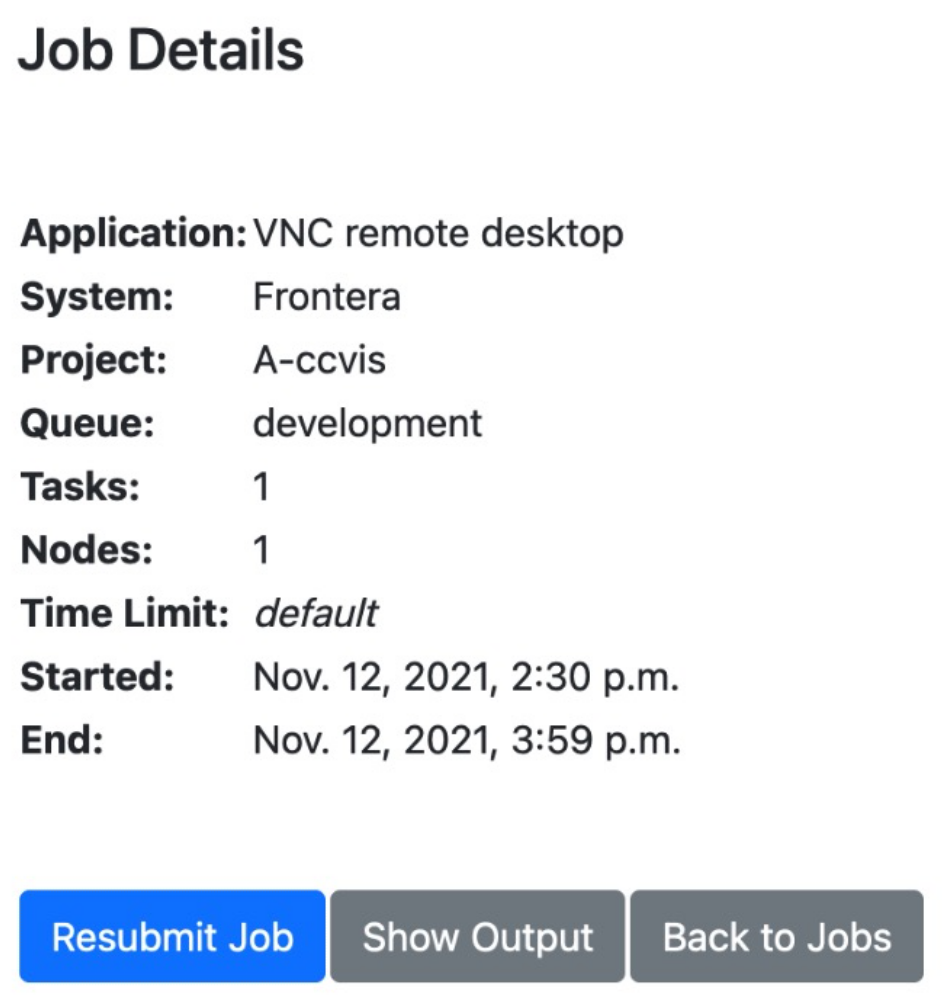
Utilities
TAP provides certain useful diagnostic and logistic utilities on the Utilities page. Access the Utilities page by selecting the Utilities ( 9 ) button on the Home Screen page.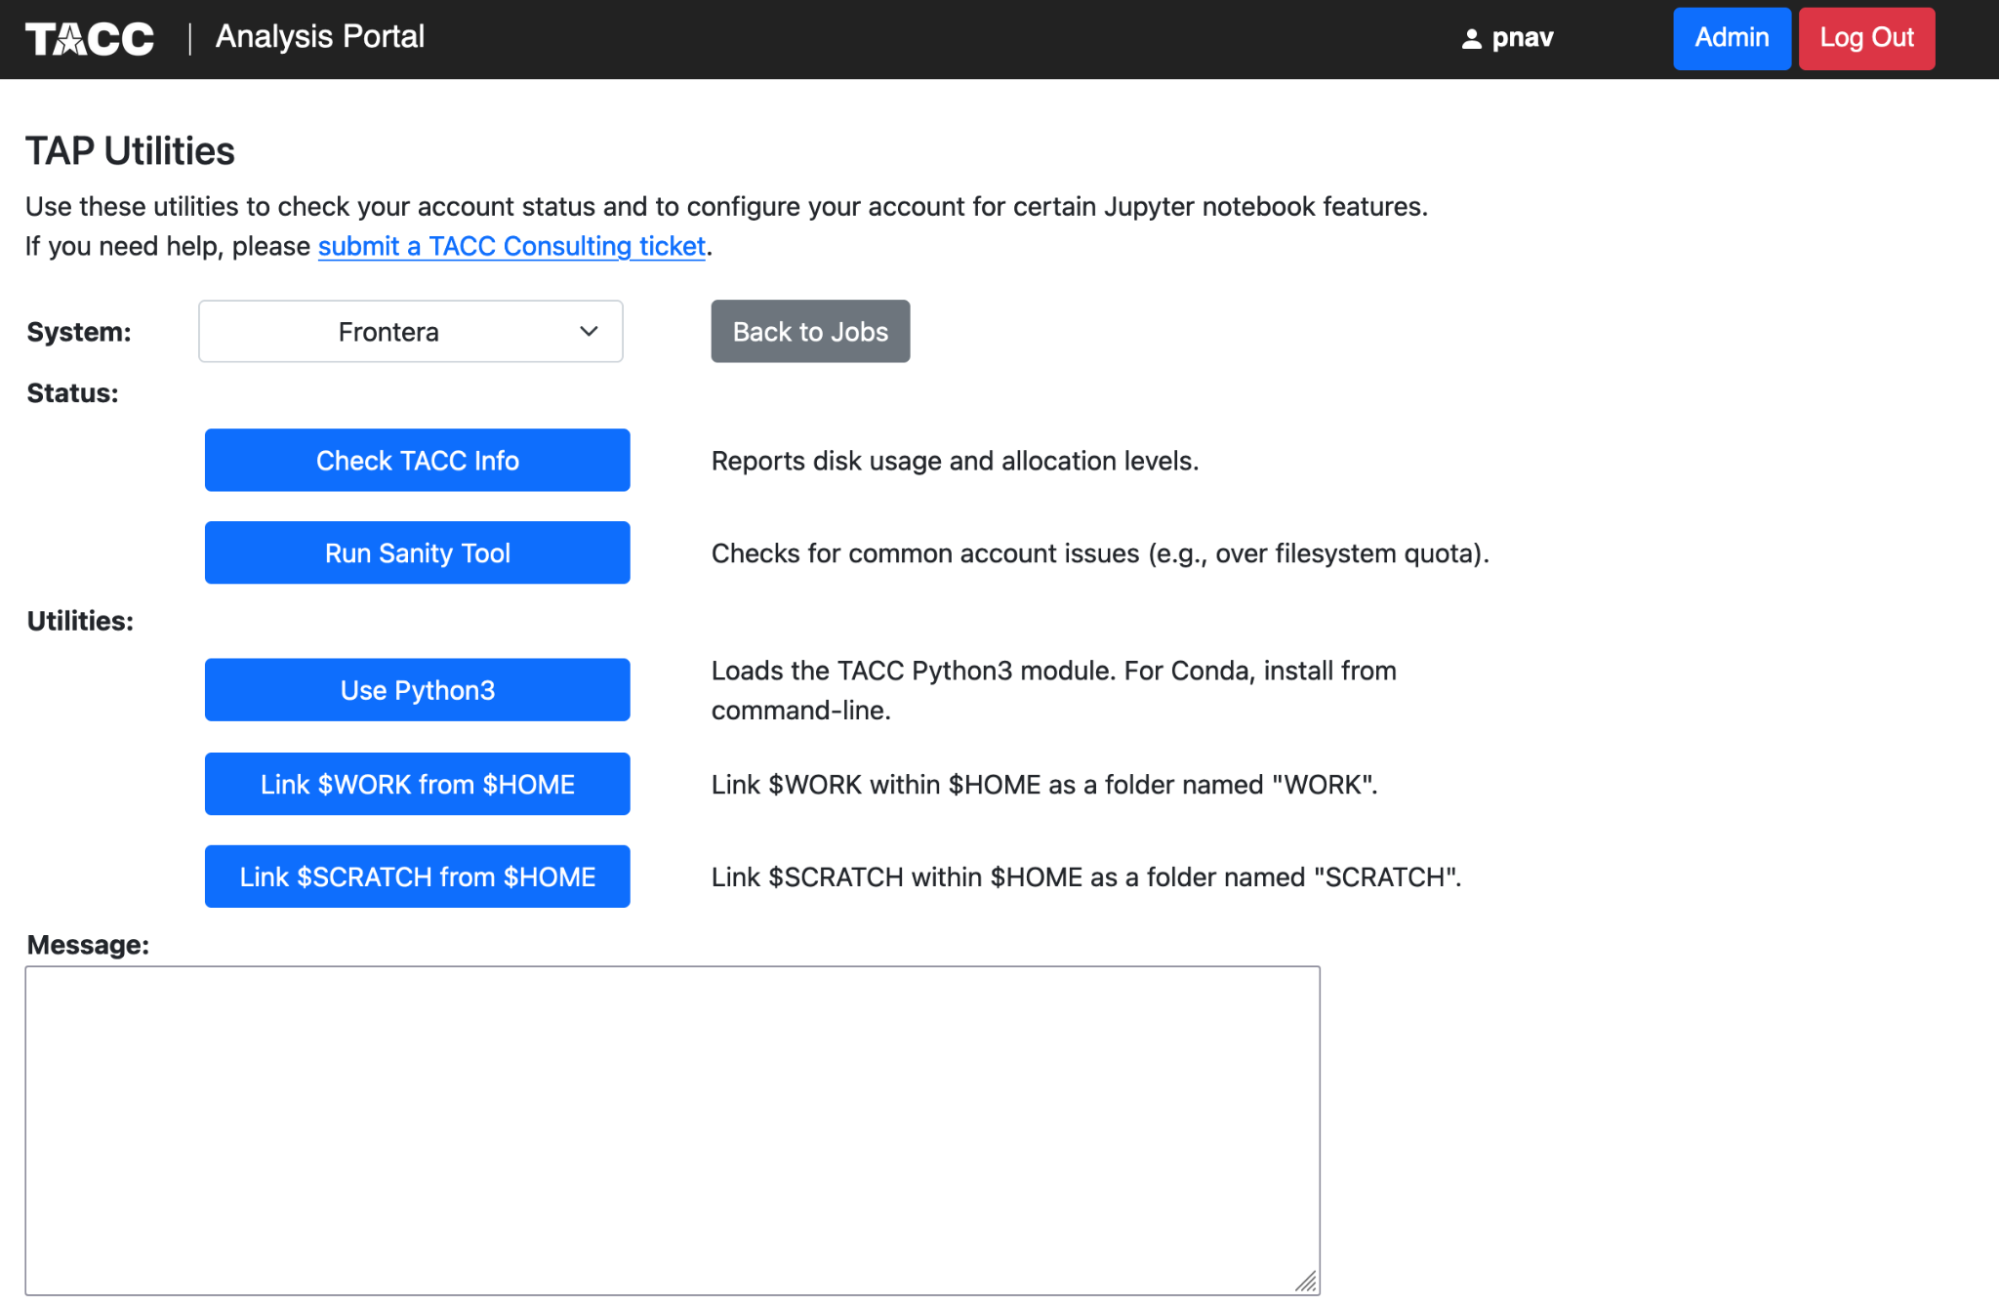
Configuring Jupyter Notebook
The Utilities section provides access to several common actions related to Jupyter Notebooks.
“Use Python3” sets the TACC Python3 module as part of your default modules so that TAP will use Python3 for Jupyter Notebooks. If you want to use a non-default Python installation, such as Conda, you will need to install it yourself via the system command line. TAP will use the first
jupyter-notebookcommand in your$PATH, so make sure that the commandwhich jupyter-notebookreturns the Jupyter Notebook you want to use. Conda install typically configures your environment so that Conda is first on your$PATH.“Link $WORK from $HOME” and “Link $SCRATCH from $HOME” create symbolic links in your
$HOMEdirectory so that you can access$WORKand$SCRATCHfrom within a Jupyter Notebook. TAP launches Jupyter Notebooks from within your$HOMEdirectory, so these other file systems are not reachable without such a linking mechanism. The links will show up as “WORK” and “SCRATCH” in the Jupyter file browser. You only need to create these links once and they will remain available for all future jobs.
Warning
Vista by default does not have the Python3 module loaded, nor is it in the default module path. This means that if you try to run a Jupyter Notebook on Vista, it will return an error. To fix this, you must manually log in to Vista on the command line and perform the following steps:
[vista]$ module load gcc
[vista]$ module load python3
[vista]$ module save
This is a one-time setup step. After this, you can use TAP to launch Jupyter Notebooks on Vista.
Obtaining TACC Account Status
The Status section provides system information and diagnostics. “Check TACC Info” will show account
balances and filesystem usage for the selected system. “Run Sanity Tool” performs a series of sanity
checks to catch common account issues that can impact TAP jobs (for example, being over filesystem
quota on your $HOME directory).
Troubleshooting TAP
If you encounter an error while using TAP, or if your job status remains in “PENDING” for more than a few moments, alert the workshop instructors.
Note
For this workshop, we will be using Frontera and Vista systems, and we will be launching both DCV sessions and Jupyter Notebooks. Each day has a unique reservation name. Make sure to choose the right system, application, and reservation name each day. If you are not sure, ask one of the instructors for help.
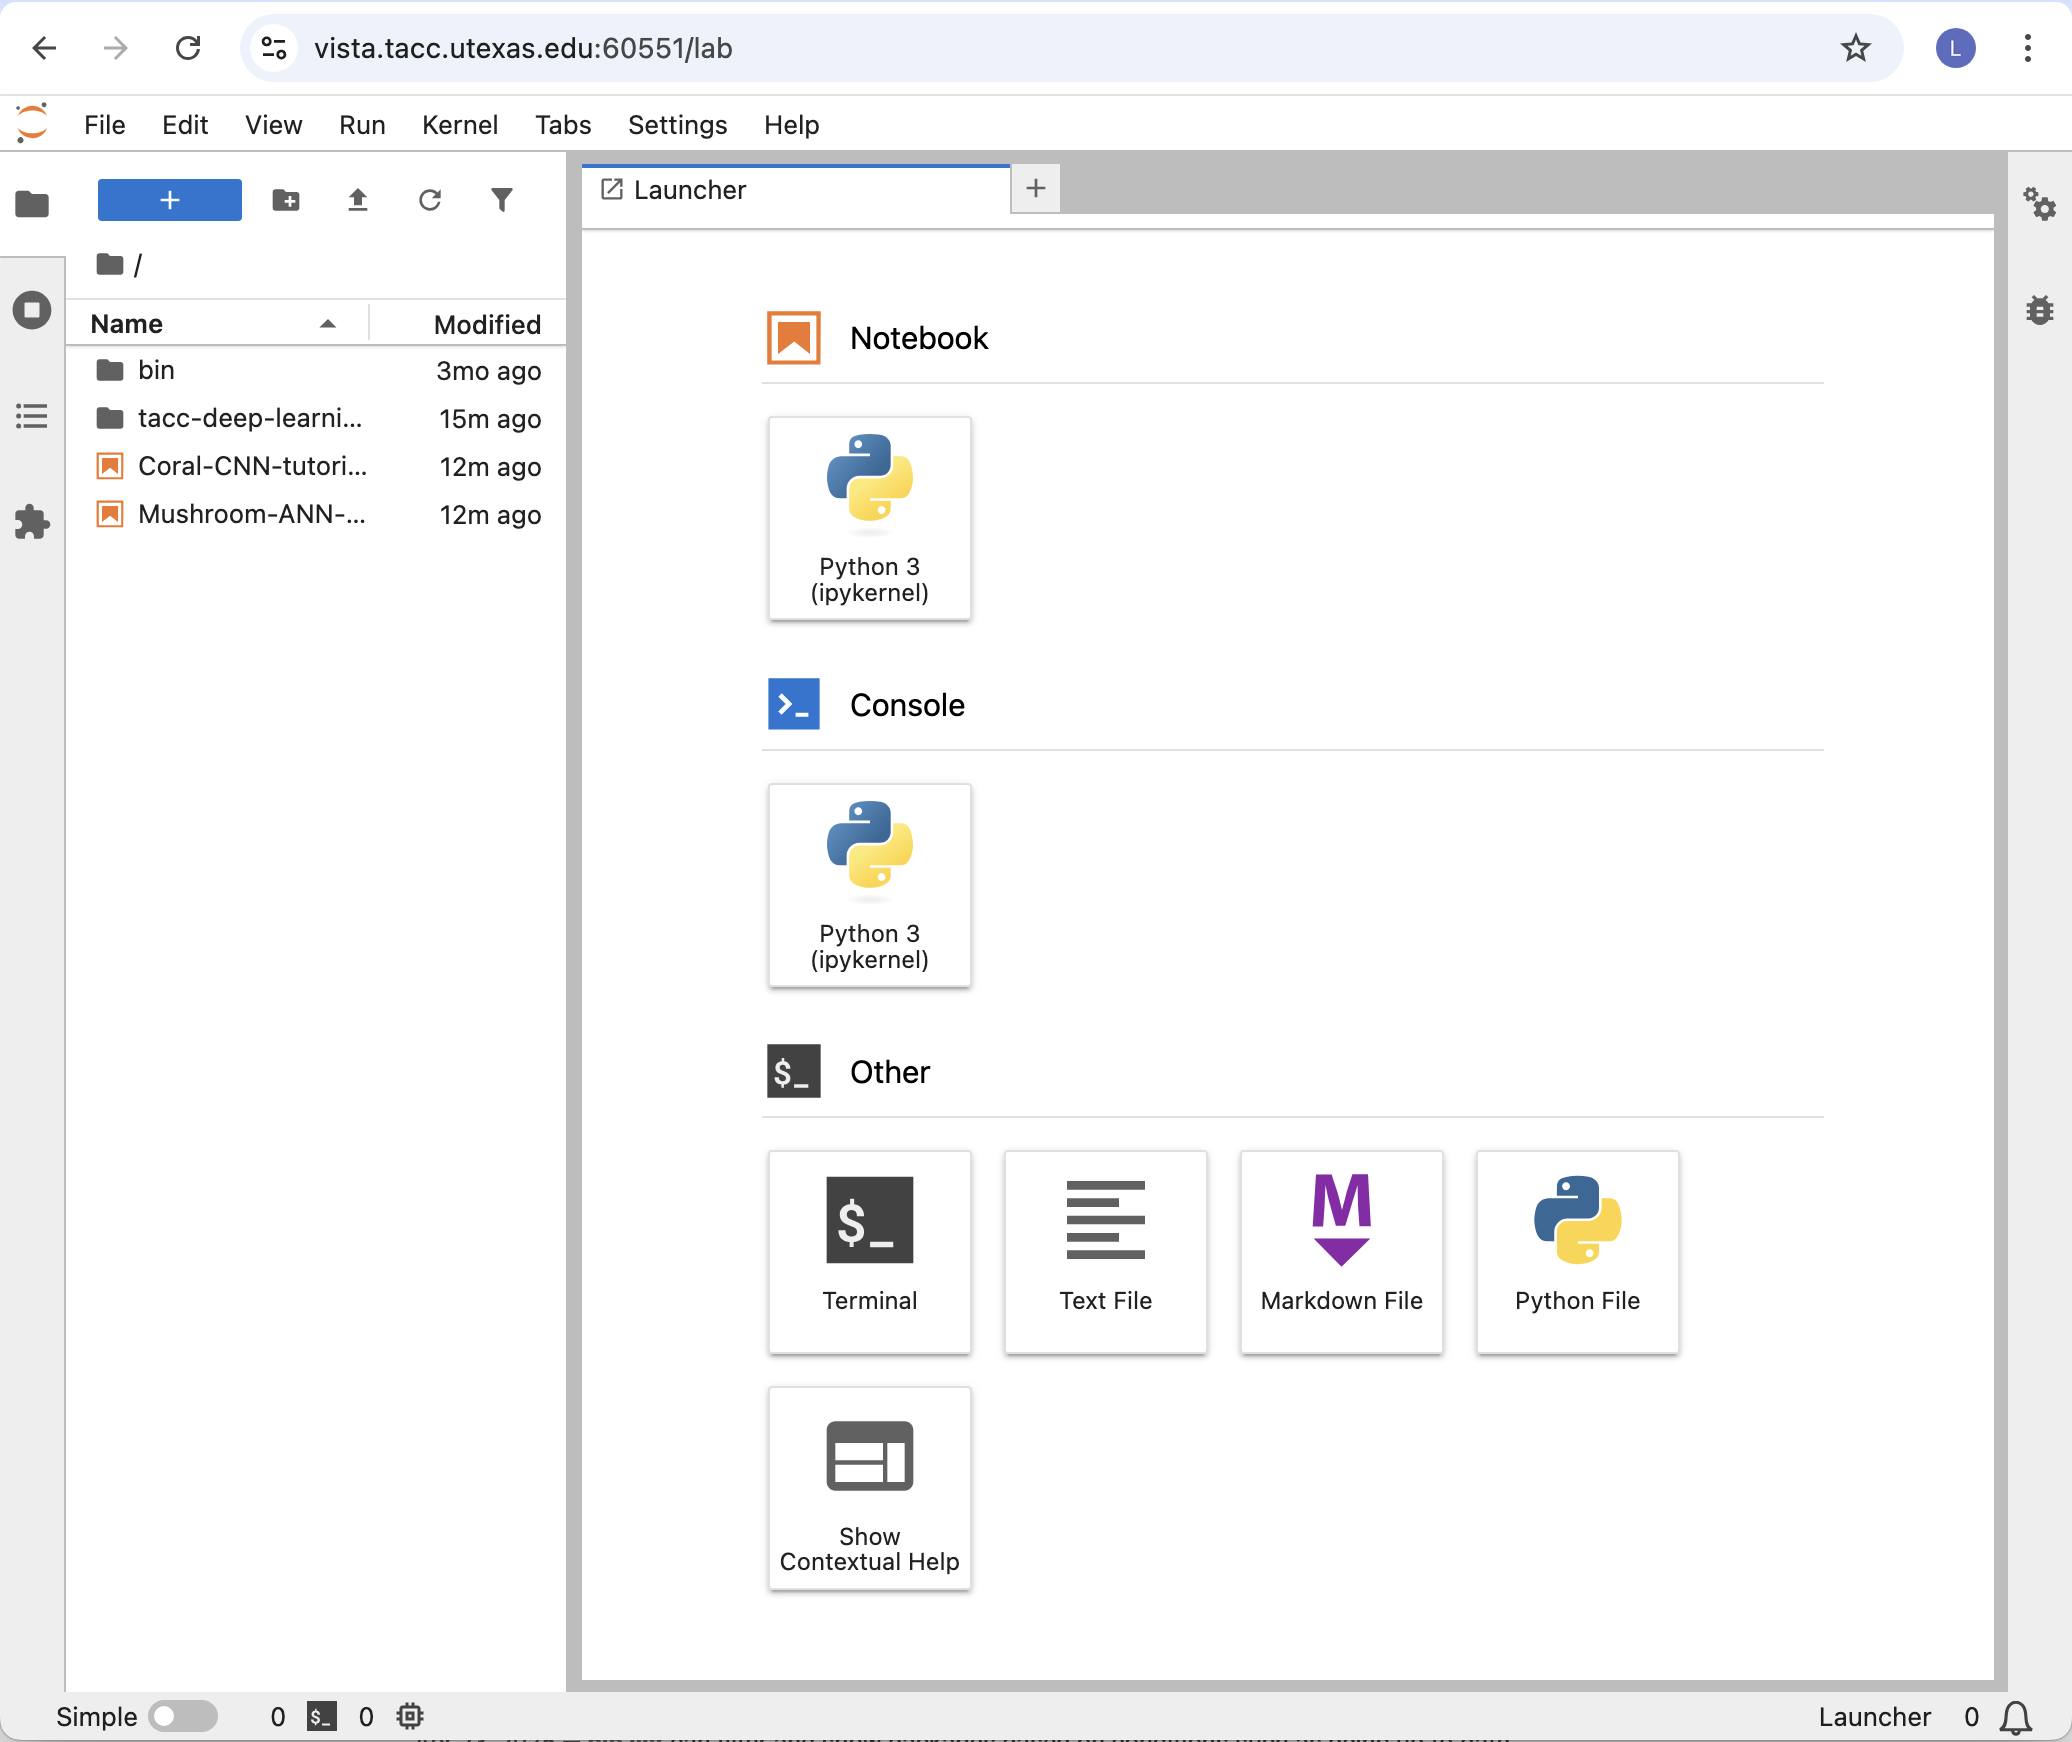
Using Jupyter Notebooks
When you connect to a Jupyter Notebook session, you will be presented with the default file browser view. To start a new notebook, click on the “New” button in the top right corner and select the desired kernel. The default kernel is Python 3.
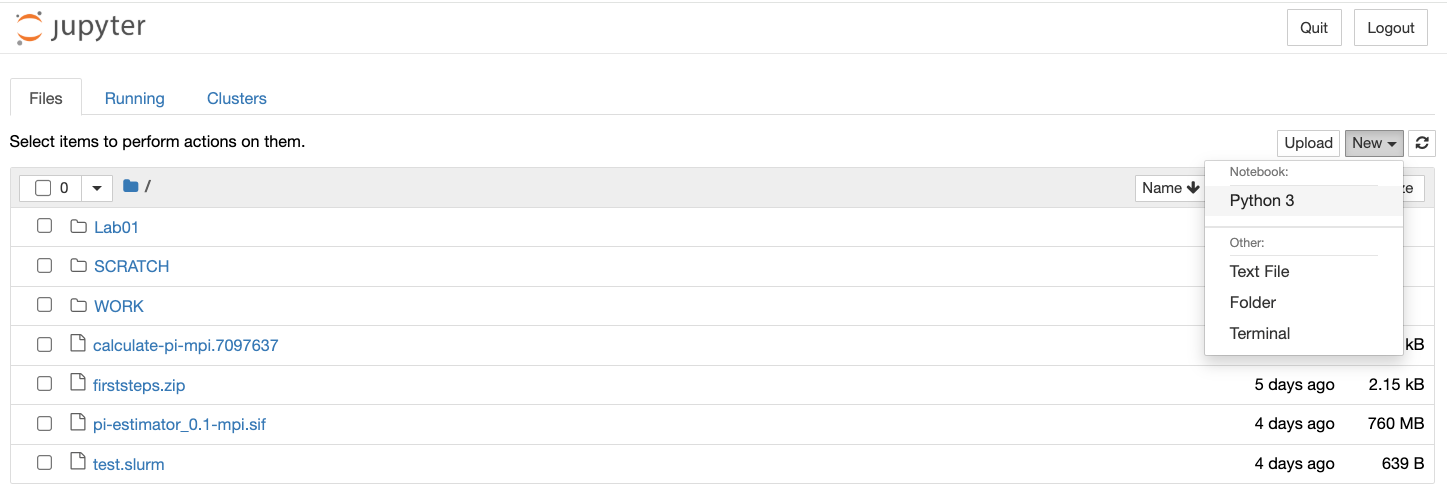
Warning
The workshop instructors will configure your accounts with additional kernels, and will inform you which kernels should be selected for each day of the workshop.
Jupyter Notebook User Interface
After selecting the kernel, you will be taken to the Jupyter Notebook user interface. The notebook user interface is a web-based application that allows you to create and share documents that contain live code, equations, visualizations, and narrative text. The notebook interface is designed to be intuitive and easy to use. The main components of the Jupyter Notebook user interface are:
Notebook name: The name displayed at the top of the page, next to the Jupyter logo, reflects the name of the
.ipynbfile. Clicking on the notebook name brings up a dialog which allows you to rename it.Menu bar: The menu bar contains various options for manipulating the notebook. You can use the menu bar to create new notebooks, open existing notebooks, save notebooks, and perform other operations.
Toolbar: The tool bar gives a quick way of performing the most-used operations within the notebook, by clicking on an icon. For example, you can use the toolbar to execute code cells, insert new cells, and change the cell type.
Cells: The main building blocks of Notebooks are the cells. Each cell can contain either code or text. You can add new cells, delete cells, and move cells around in the notebook. The order of the cells is important, as the output of one cell may depend on the input of another cell.
Output: The output of the code will be displayed directly below the cell.

Code Cells
Code cells are blocks of code that can be executed. You can write code in the cell and execute it by
either pressing the “Run” button in the toolbar or using the keyboard shortcut Shift+Enter. The
output of the code will be displayed directly below the cell.
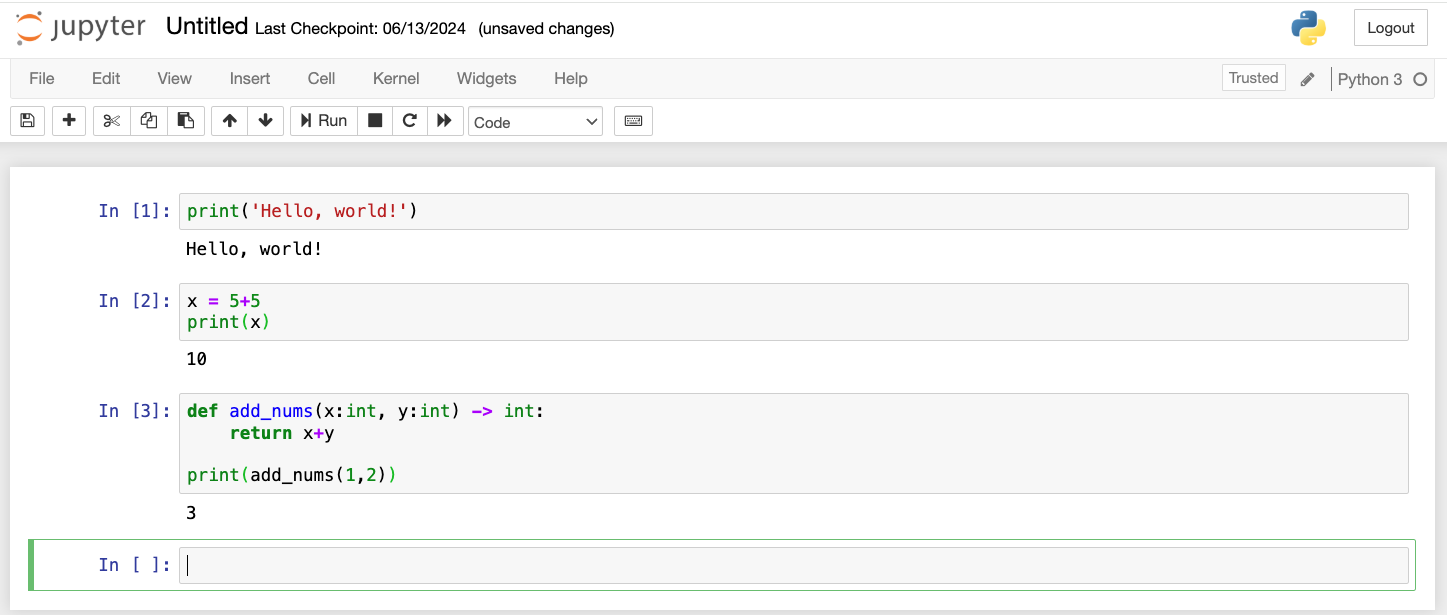
Jupyter Notebooks can also import Python libraries (with the import statement), be used to
define functions, display plots, and run any arbitrary Python code. Be aware that the order in which
you run the cells matters. For example, you must first import a library befor you can use it.
Markdown Cells
Markdown cells are blocks of text that can be formatted using Markdown syntax. You can use Markdown
to create headings, lists, links, images, and other types of formatted text. To create a Markdown
cell, select the cell type from the drop-down menu in the toolbar and write your text using Markdown
syntax. You can execute the Markdown cell by pressing the “Run” button or using the keyboard
shortcut Shift+Enter. The cell will be rendered as formatted text.
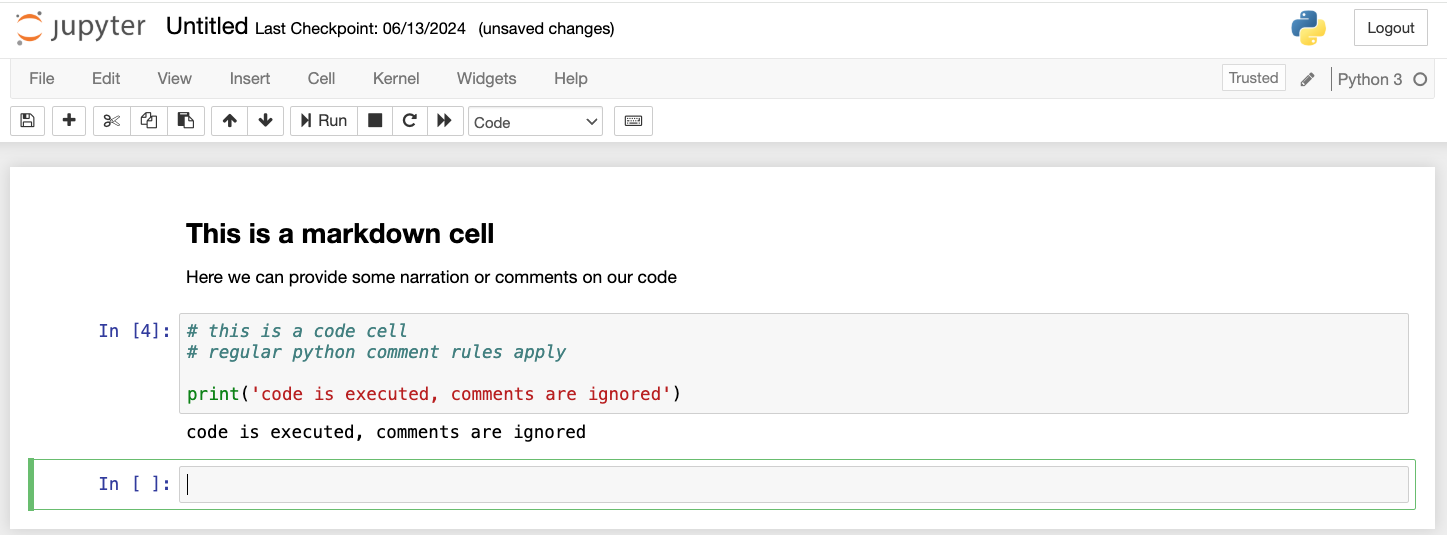
Markdown cells will follow standard Markdown syntax for formatting headings, lists, text emphasis, etc. Please refer to the Markdown documentation for more information on how to use Markdown syntax.
Saving .ipynb File
The Jupyter Notebook can be saved as a .ipynb file by clicking on the “Save” button in the
toolbar. Saving a notebook will save the current state of the notebook, including all code cells,
output, and Markdown cells. However, if you re-open the notebook you will need to re-run the code
cells to see the output.
You can share Notebooks with others by sending them the .ipynb file. The recipient can open the
notebook in their own Jupyter Notebook environment and run the code cells to see the output. The
recipient will need to use the same kernel, or a kernel with the same libraries installed, in order
to run the code cells successfully.
Jupyter Terminal
Jupyter provides a terminal interface that allows you to run shell commands directly from the notebook. You can open a terminal by clicking on the “New” button in the top right corner and selecting “Terminal”. The terminal will open in a new tab and you can run shell commands just like you would in a regular terminal. This is useful for running shell commands, installing packages, and performing other tasks that require a command line interface.

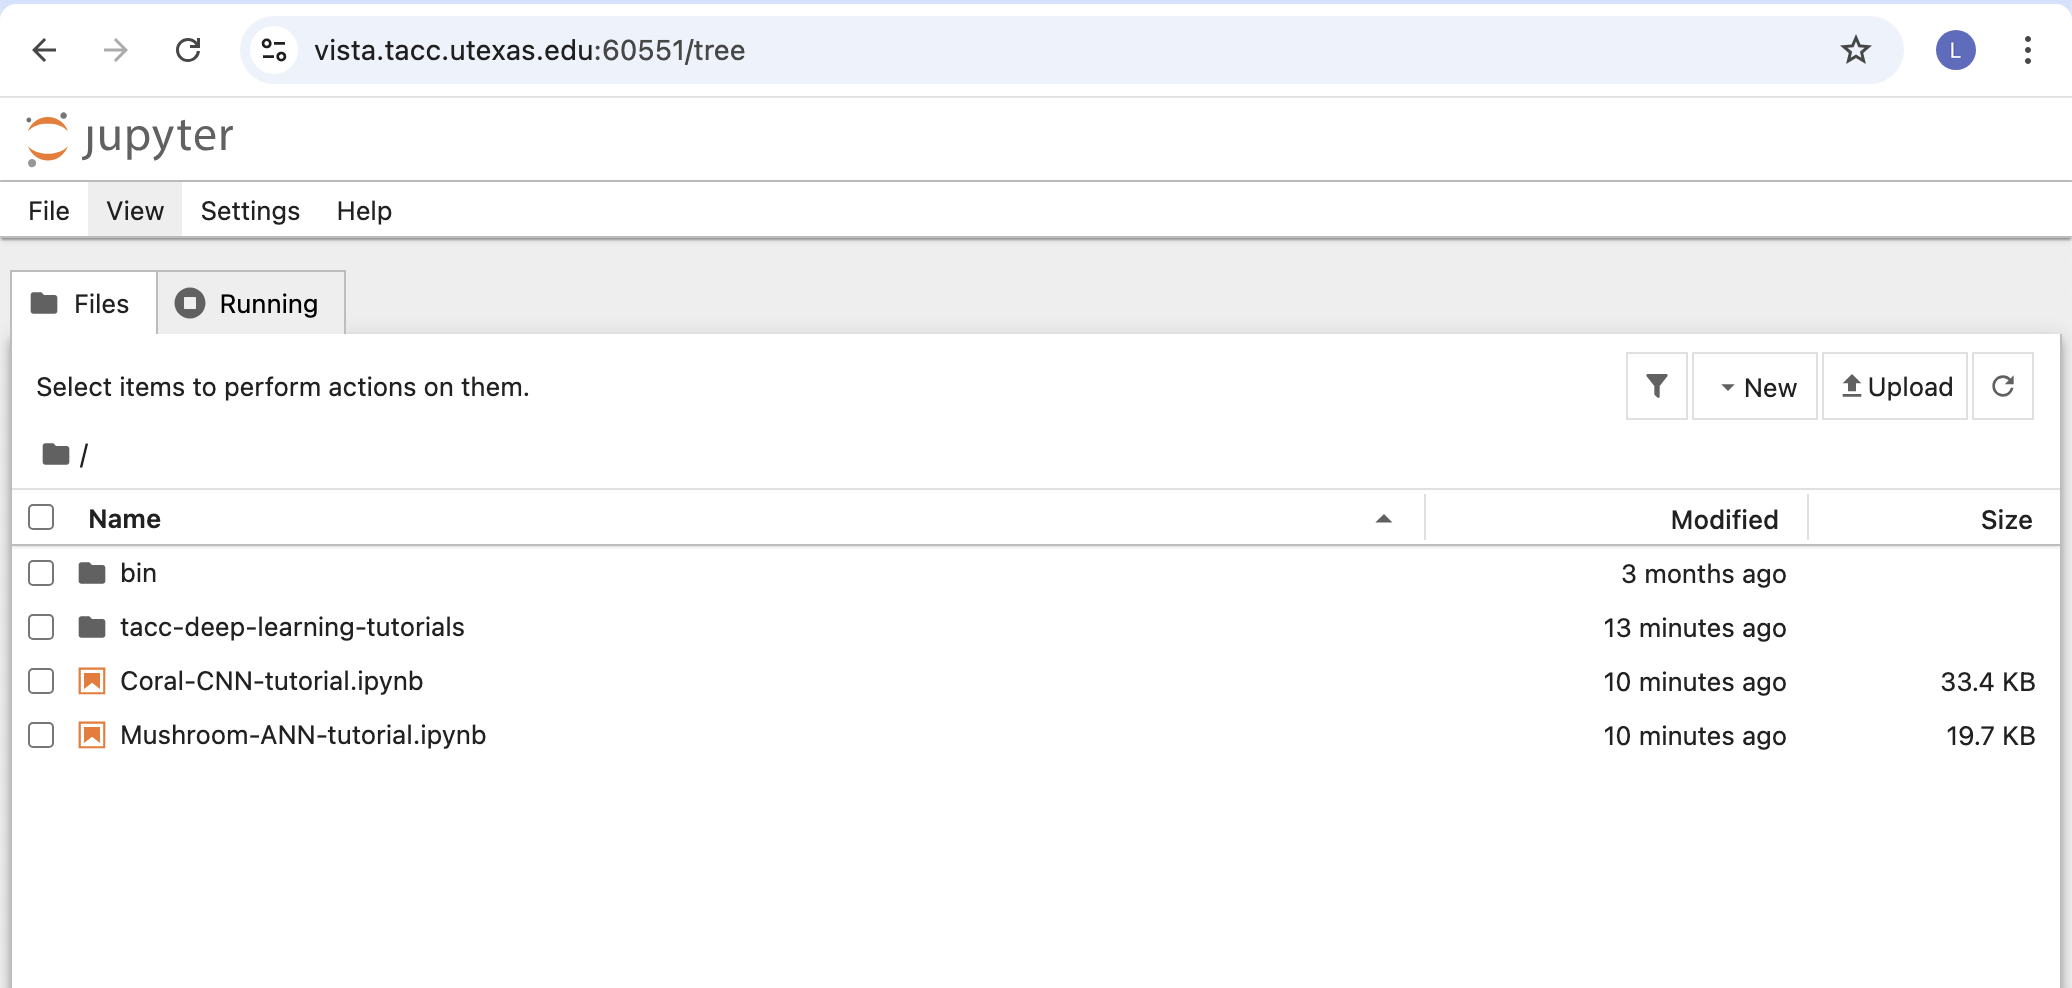
Switching Between Views
By default, Vista visualizes Jupyter in the “Lab” view.
To switch back to the standard “tree” view, edit the URL in your browser to replace the word “/lab” with “/tree”.