Set up for Tutorials
This section provides instructions for setting up the environment and gathering the correct files for two hands-on tutorials.
Set Up For Frontera
Step 1. Log in to Frontera
Log in to Frontera using SSH:
[local]$ ssh username@frontera.tacc.utexas.edu
(username@frontera.tacc.utexas.edu) Password:
(username@frontera.tacc.utexas.edu) TACC Token Code:

# ------------------------------------------------------------------------------
# Welcome to the Frontera Supercomputer
# Texas Advanced Computing Center, The University of Texas at Austin
# ------------------------------------------------------------------------------
Step 2. Gather the Tutorial Materials
Navigate to your scratch directory and clone this tutorial repository:
[frontera]$ cds # shortcut for cd $SCRATCH
[frontera]$ git clone https://github.com/kbeavers/tacc-deep-learning-tutorials
Step 3. Set up Environment
Start an interactive session on a development node, then run the setup script.
[frontera]$ cds
[frontera]$ idev -m 20
...
[clx]$ # You are now in an interactive session on a compute node
# Load the Apptainer module
[clx]$ module load tacc-apptainer

# Pull the Docker container image created for this tutorial
[clx]$ apptainer pull docker://kbeavers/tf-213:frontera

# Run the kernel setup script
[clx]$ cd tacc-deep-learning-tutorials/
[clx]$ bash ./scripts/install_kernel.sh
Step 4. Dataset Preparation
Extract the provided coral species image dataset.
[clx]$ bash ./scripts/download_dataset.sh
Step 5. Copy the Notebooks
Copy the tutorial notebooks to your home directory. These notebooks are provided as blank templates for you to fill in as you work through the exercises.
[clx]$ cp ./tutorials/Mushroom-ANN-tutorial.ipynb $HOME/
[clx]$ cp ./tutorials/Coral-CNN-tutorial.ipynb $HOME/
At this point, you should log out of the interactive session.
[clx]$ logout
...
[frontera]$ # You are now back on the Frontera login node
Step 6. Launch Jupyter
Log in to the TACC Analysis Portal and configure your session as follows:
System: Frontera
Application: Jupyter Notebook
Project: Frontera-Training
Queue: rtx
Job Name: DL-Training
Time Limit: 2:0:0
Reservation: LSC-ML-Institute-May19
Warning
The reservation name changes day by day.
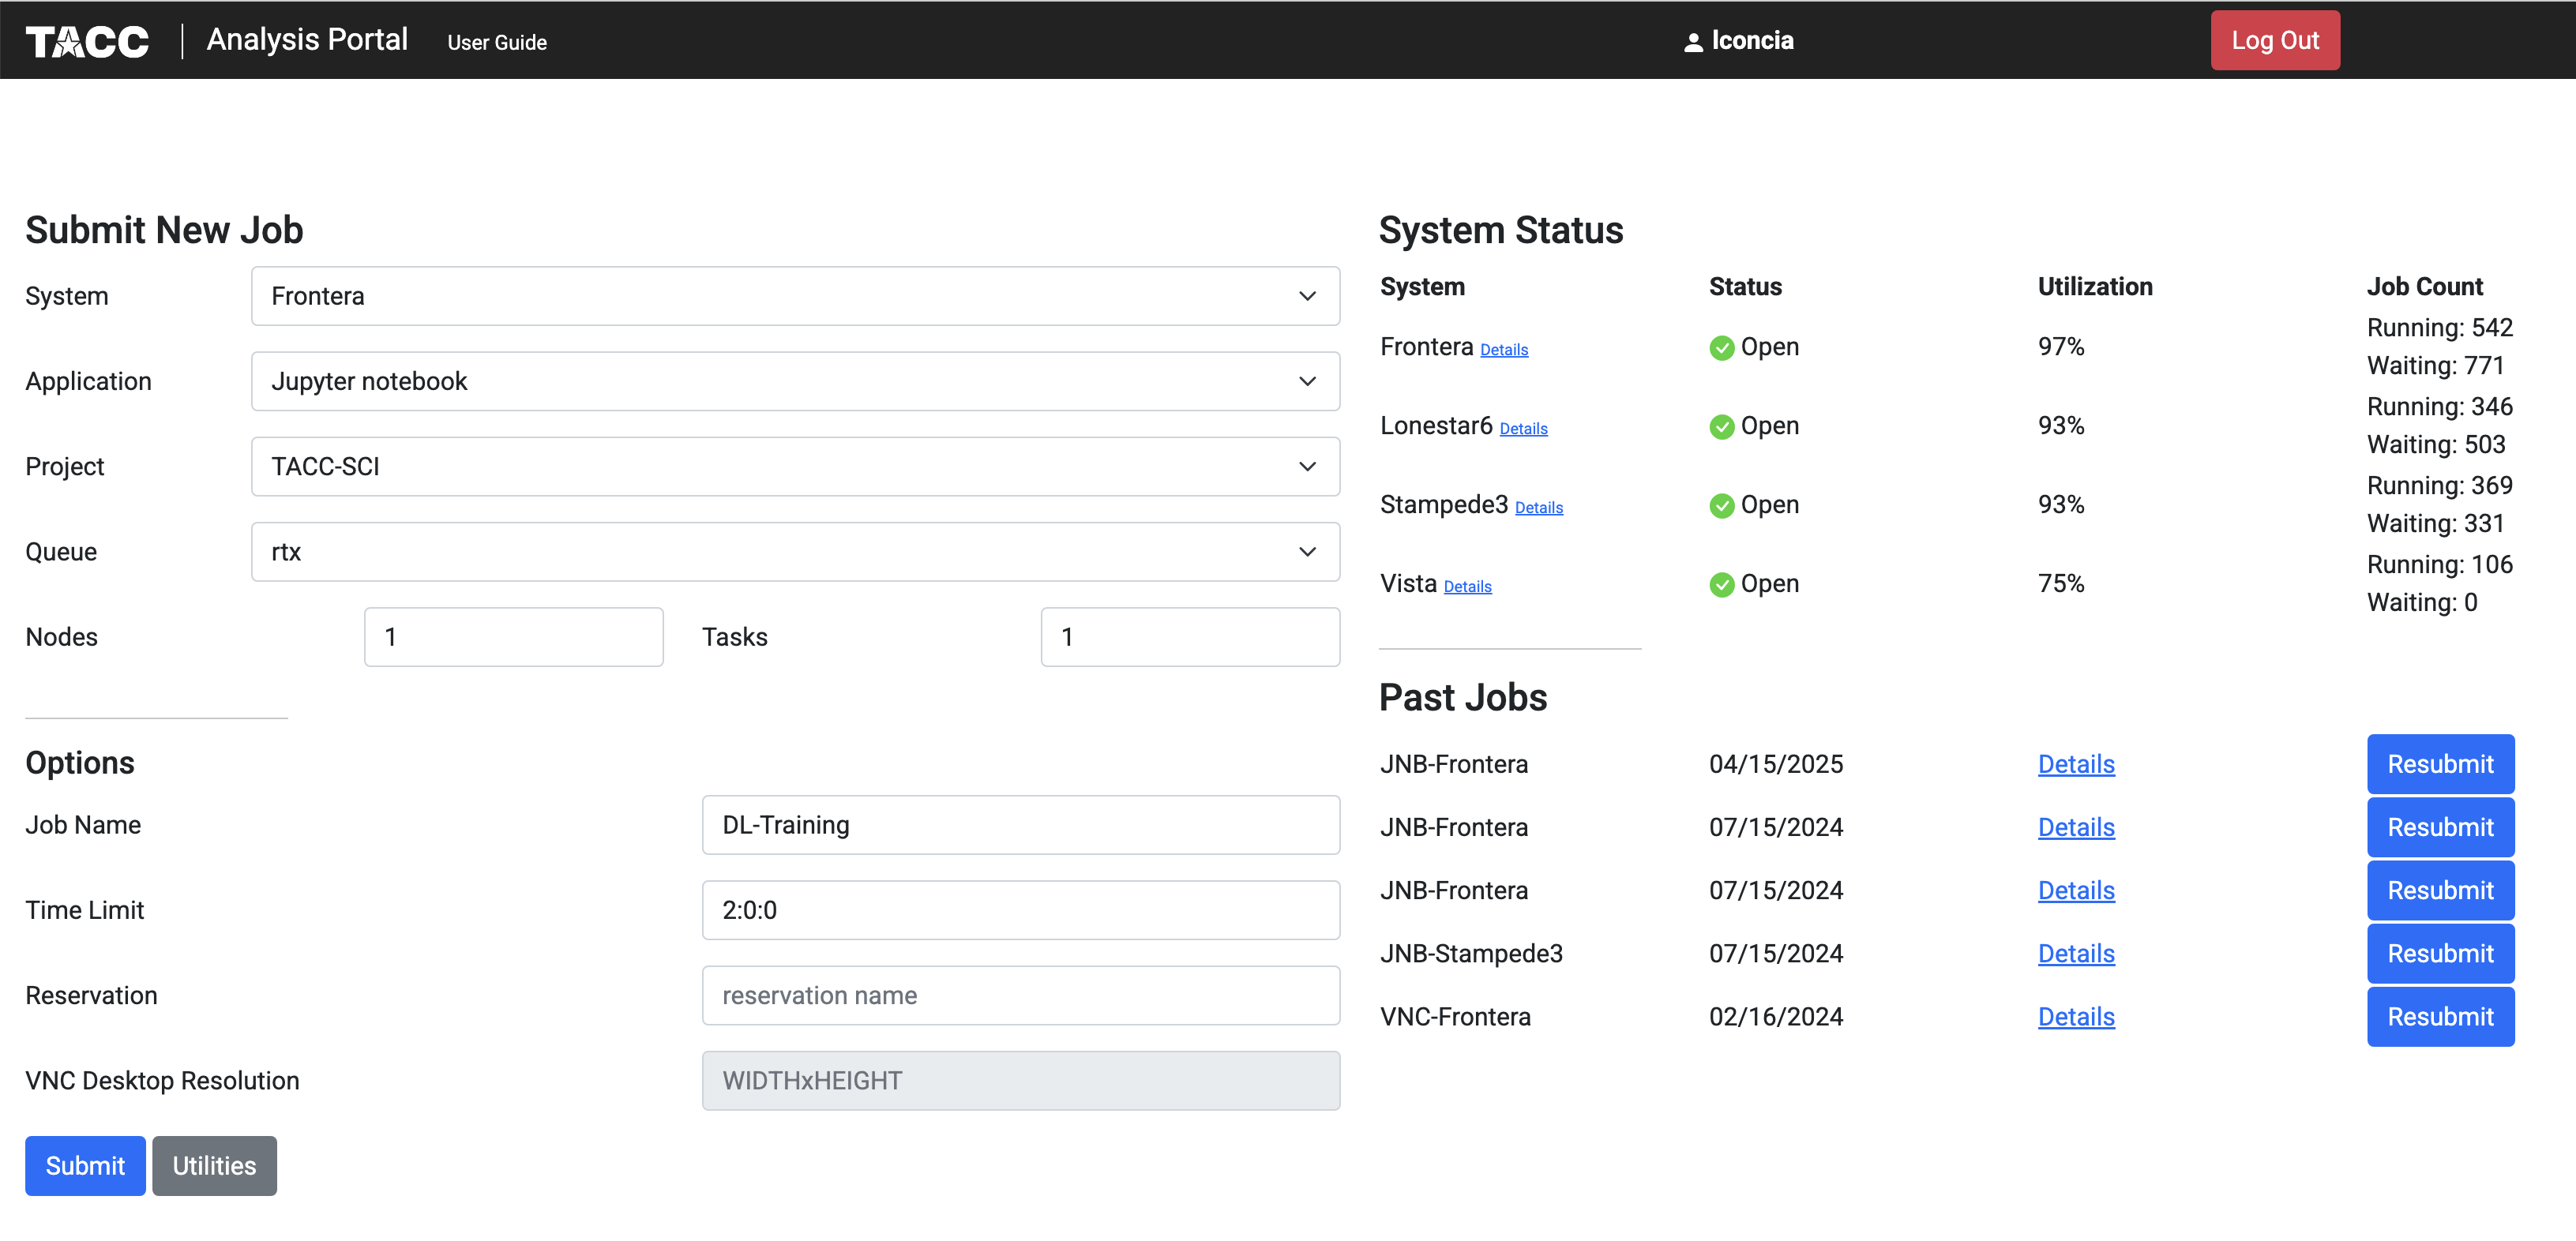
Click ‘Submit’ and wait for the job to start
Click ‘Connect’ when the a node becomes available
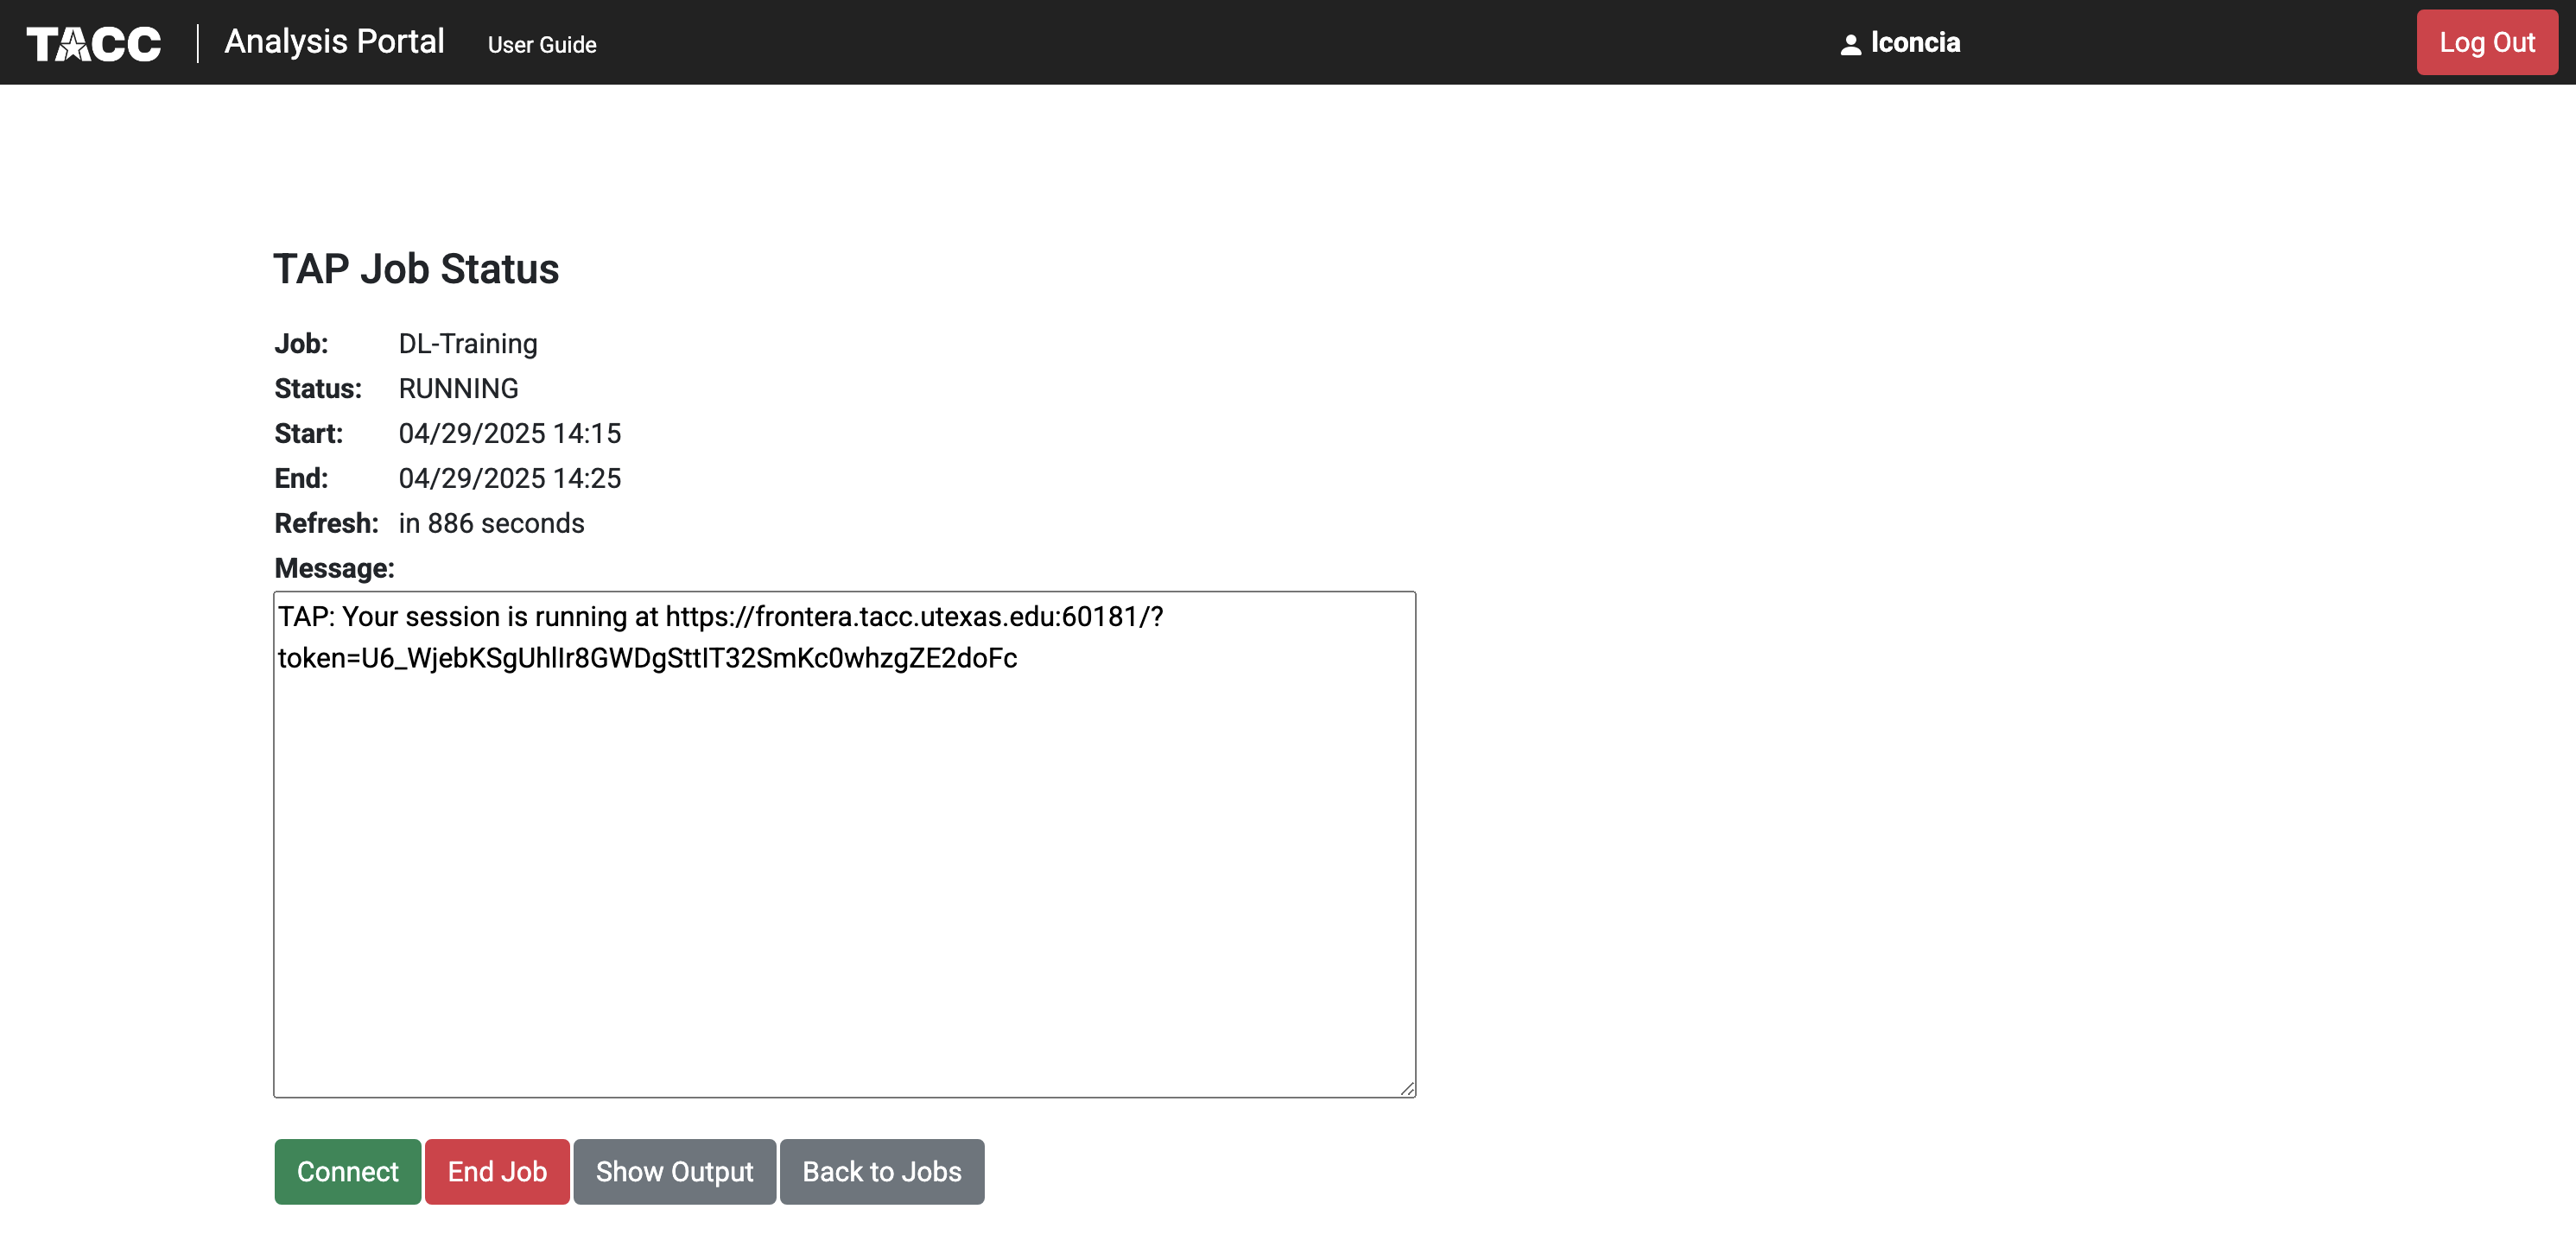
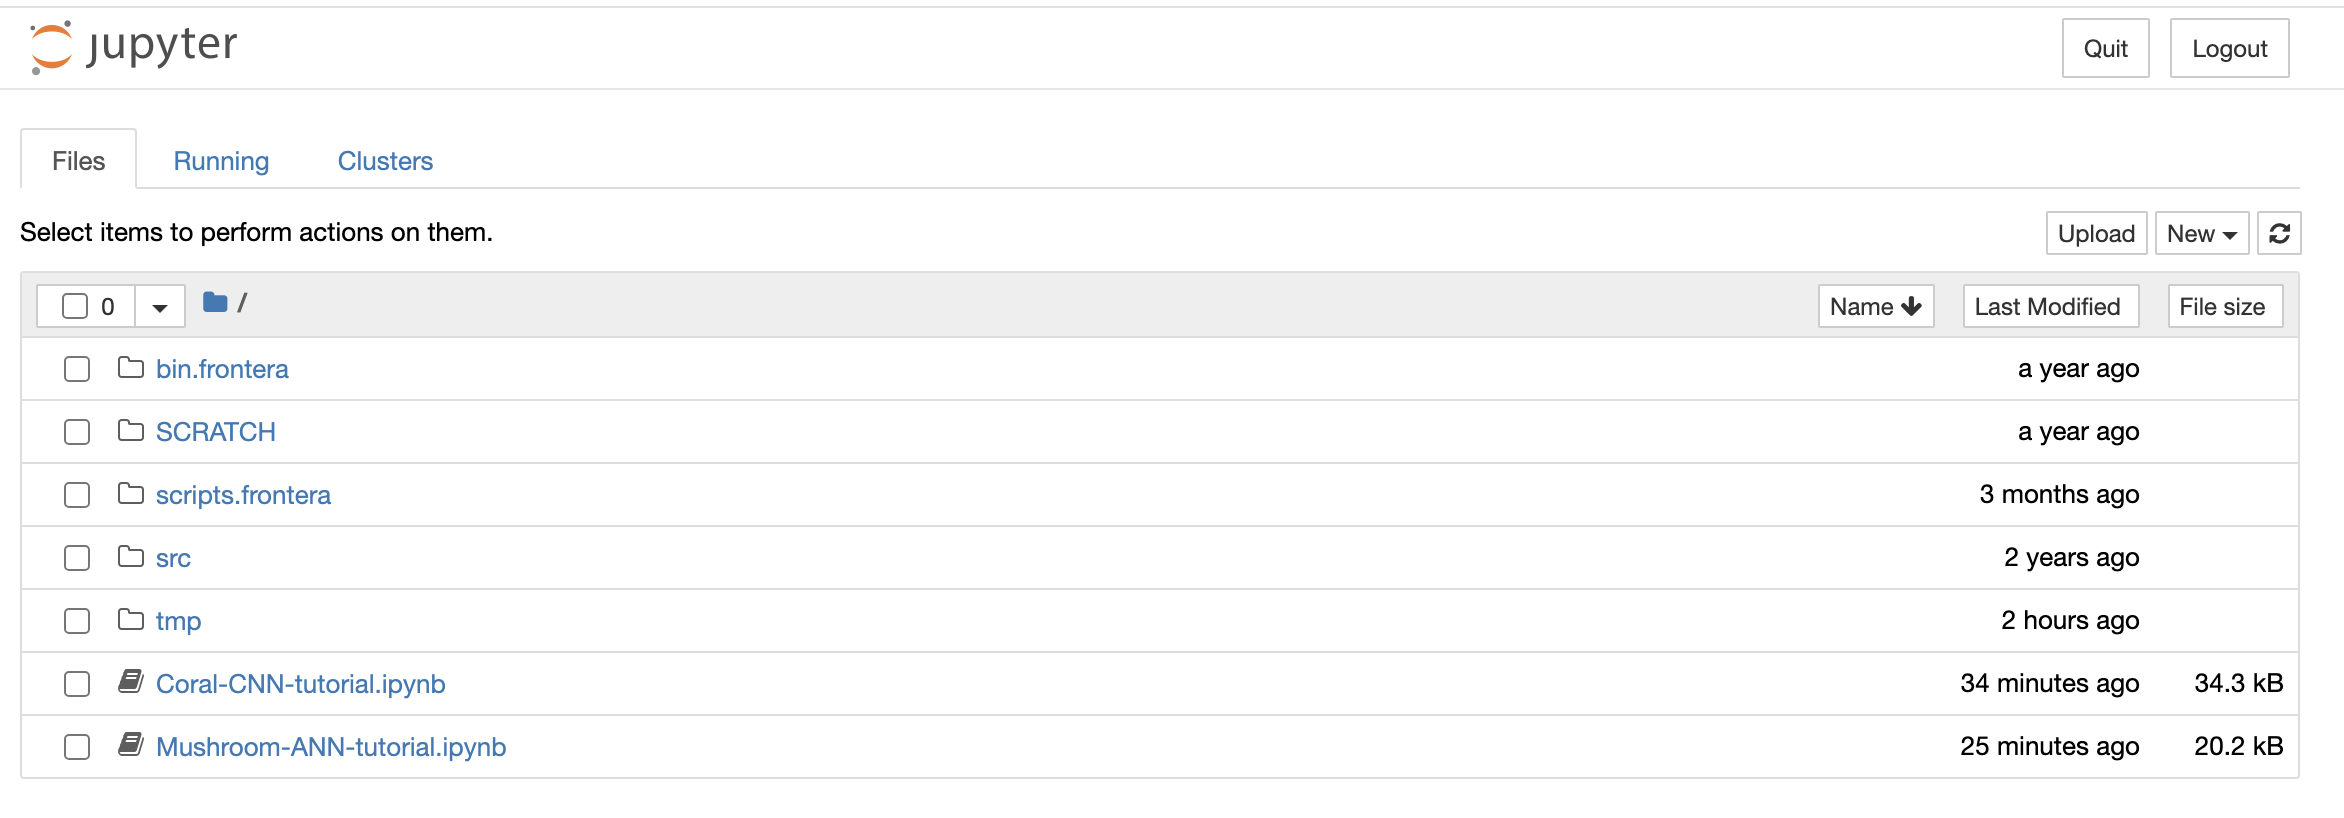
The TAP job will open the user
$HOMEdirectory. OpenMushroom-ANN-tutorial.ipynborCoral-CNN-tutorial.ipynb.
Change your kernel to
Day3-tf-213. Click on the menukernel, thenChange kernel, and select the kernelDay3-tf-213. Trust the kernel by clicking on the button “Not trusted” at the top right
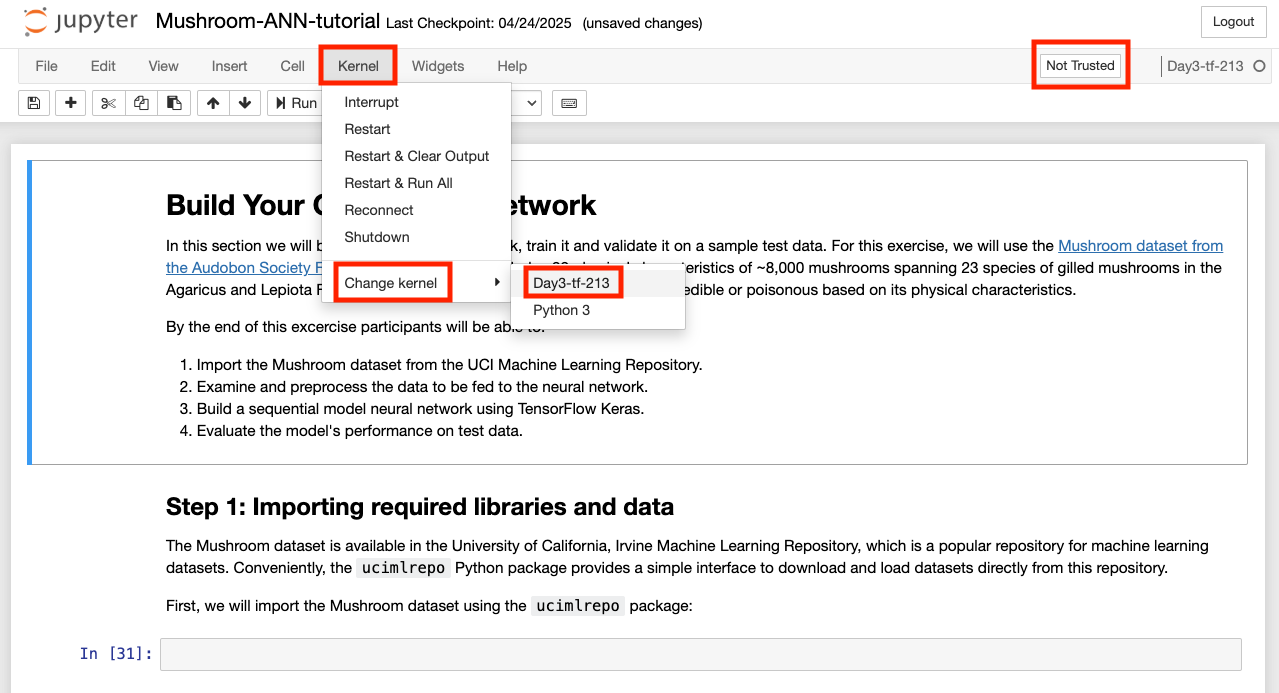
The Jupyter notebook will ask confirmation before trusting the kernel.
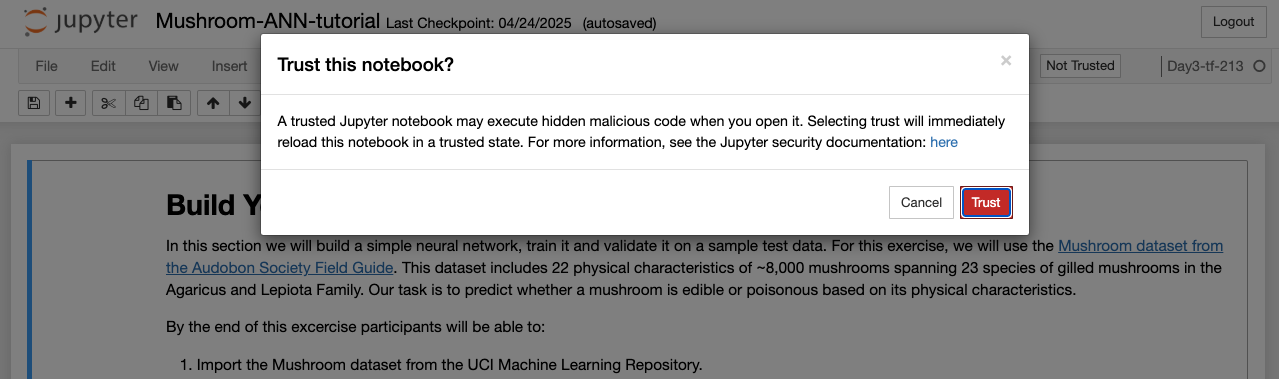
After clicking “trust” on the confirmation button, the button at the top right will appear as “Trusted”.
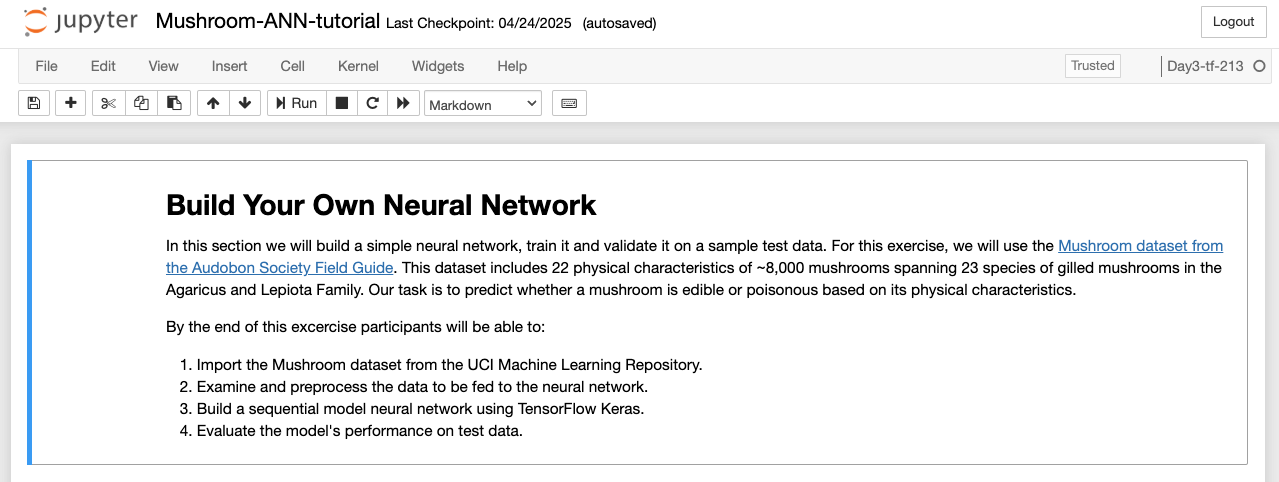
The Jupyer notebook will be ready to be run. Note: The kernel may take a few moments to initialize on first use.
Complete the Tutorial
To complete this tutorial:
Follow the step-by-step instructions on our ReadTheDocs.
Write the code from the ReadTheDocs page into the corresponding empty cells in your notebook.
Execute each cell to build your ANN/CNN and see the results.
If you get stuck, a completed solution is available within the tutorials directory of the
repository you cloned previously.
Check GPU Availability
Before training deep learning models on HPC systems, it’s important to check whether TensorFlow can access the GPU. Training on a GPU is significantly faster than on a CPU, especially for large image datasets.
If you’ve followed the setup instructions in the previous section, and you’ve run the
install_kernel.sh script on Frontera, you should now be running the tutorial notebook inside a
containerized Jupyter kernel that includes:
TensorFlow (v2.13) with GPU support
CUDA libraries compatible with the system
All required Python packages pre-installed
To confirm that your environment is correctly configured, run the following code cell in the tutorial notebook:
Tip
Make sure to change your kernel to Day3-tf-213.
>>> import tensorflow as tf

>>> # Check if TensorFlow can detect the GPU
>>> print("Num GPUs Available: ", len(tf.config.list_physical_devices('GPU')))

>>> # Print TensorFlow version
>>> print(tf.__version__)
Set Up For Vista
Step 1. Log in to Vista
Log in to Vista using SSH:
[local]$ ssh username@vista.tacc.utexas.edu
(username@vista.tacc.utexas.edu) Password:
(username@vista.tacc.utexas.edu) TACC Token Code:

# ------------------------------------------------------------------------------
# Welcome to the Vista Supercomputer
# Texas Advanced Computing Center, The University of Texas at Austin
# ------------------------------------------------------------------------------
Step 2. Set up Environment
Download the setup script (install_kernels.sh) and run it to set up the environment. This script will copy the Jupyter
kernel image files into your SCRATCH directory and install the kernel definition files into your HOME directory.
# Change to your SCRATCH directory
[vista]$ cds

# Download the setup script
[vista]$ wget https://raw.githubusercontent.com/TACC/life_sciences_ml_at_tacc/refs/heads/main/docs/section4/files/install_kernels.sh

# Run the setup script
[vista]$ bash ./install_kernels.sh
Copying tensorflow-ml-container_0.1.sif to /scratch/03762/eriksf...
Copying pytorch-ml-container_0.4.sif to /scratch/03762/eriksf...
Kernel directory created at ~/.local/share/jupyter/kernels/Day4-tf-217 and kernel.json has been added.
Kernel directory created at ~/.local/share/jupyter/kernels/Day4-pt-251 and kernel.json has been added.
Warning
Vista by default does not have the Python3 module loaded, nor is it in the default module path. This means that if you try to run a Jupyter Notebook on Vista, it will return an error. To fix this, you must manually log in to Vista on the command line and perform the following steps:
[vista]$ module load gcc
[vista]$ module load python3
[vista]$ module save
This is a one-time setup step. After this, you can use TAP to launch Jupyter Notebooks on Vista.
Step 3. Launch Jupyter
Log in to the TACC Analysis Portal and configure your session as follows:
System: Vista
Application: Jupyter Notebook
Project: frontera-training
Queue: gh
Reservation: LSC-ML-Institute-May22
Warning
The reservation name changes day by day.
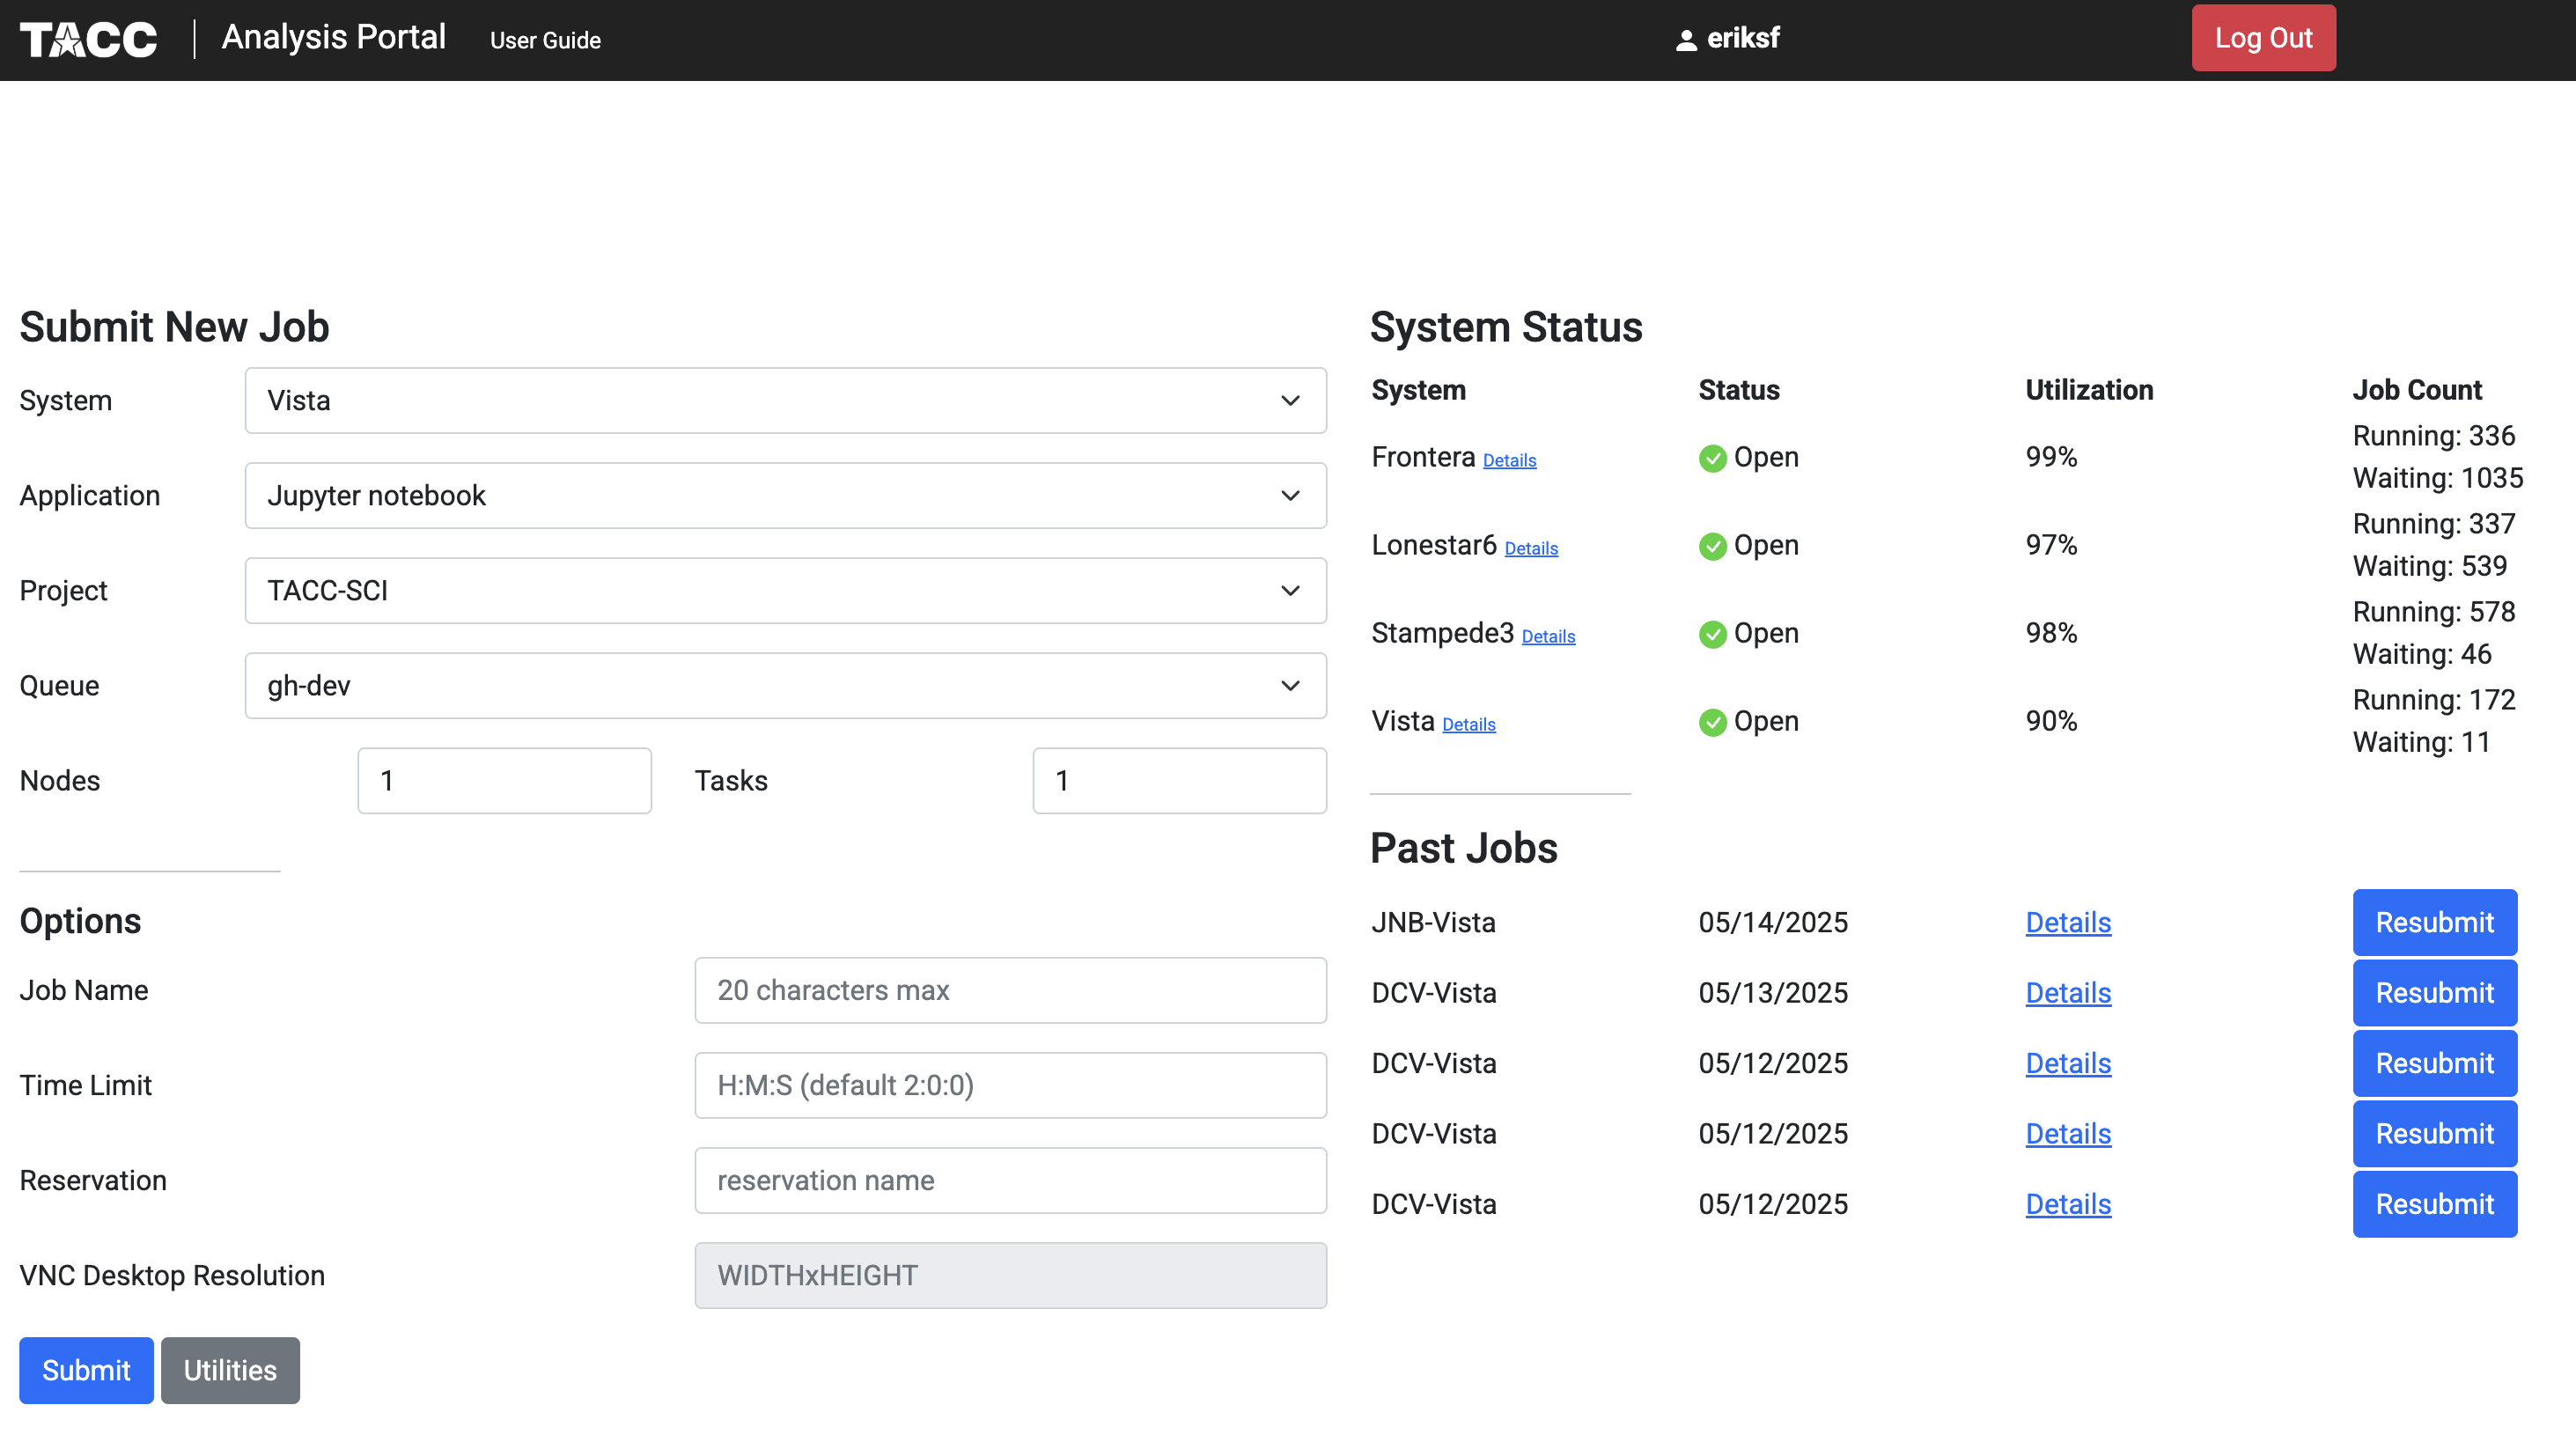
Click ‘Submit’ and wait for the job to start
Click ‘Connect’ when the a node becomes available
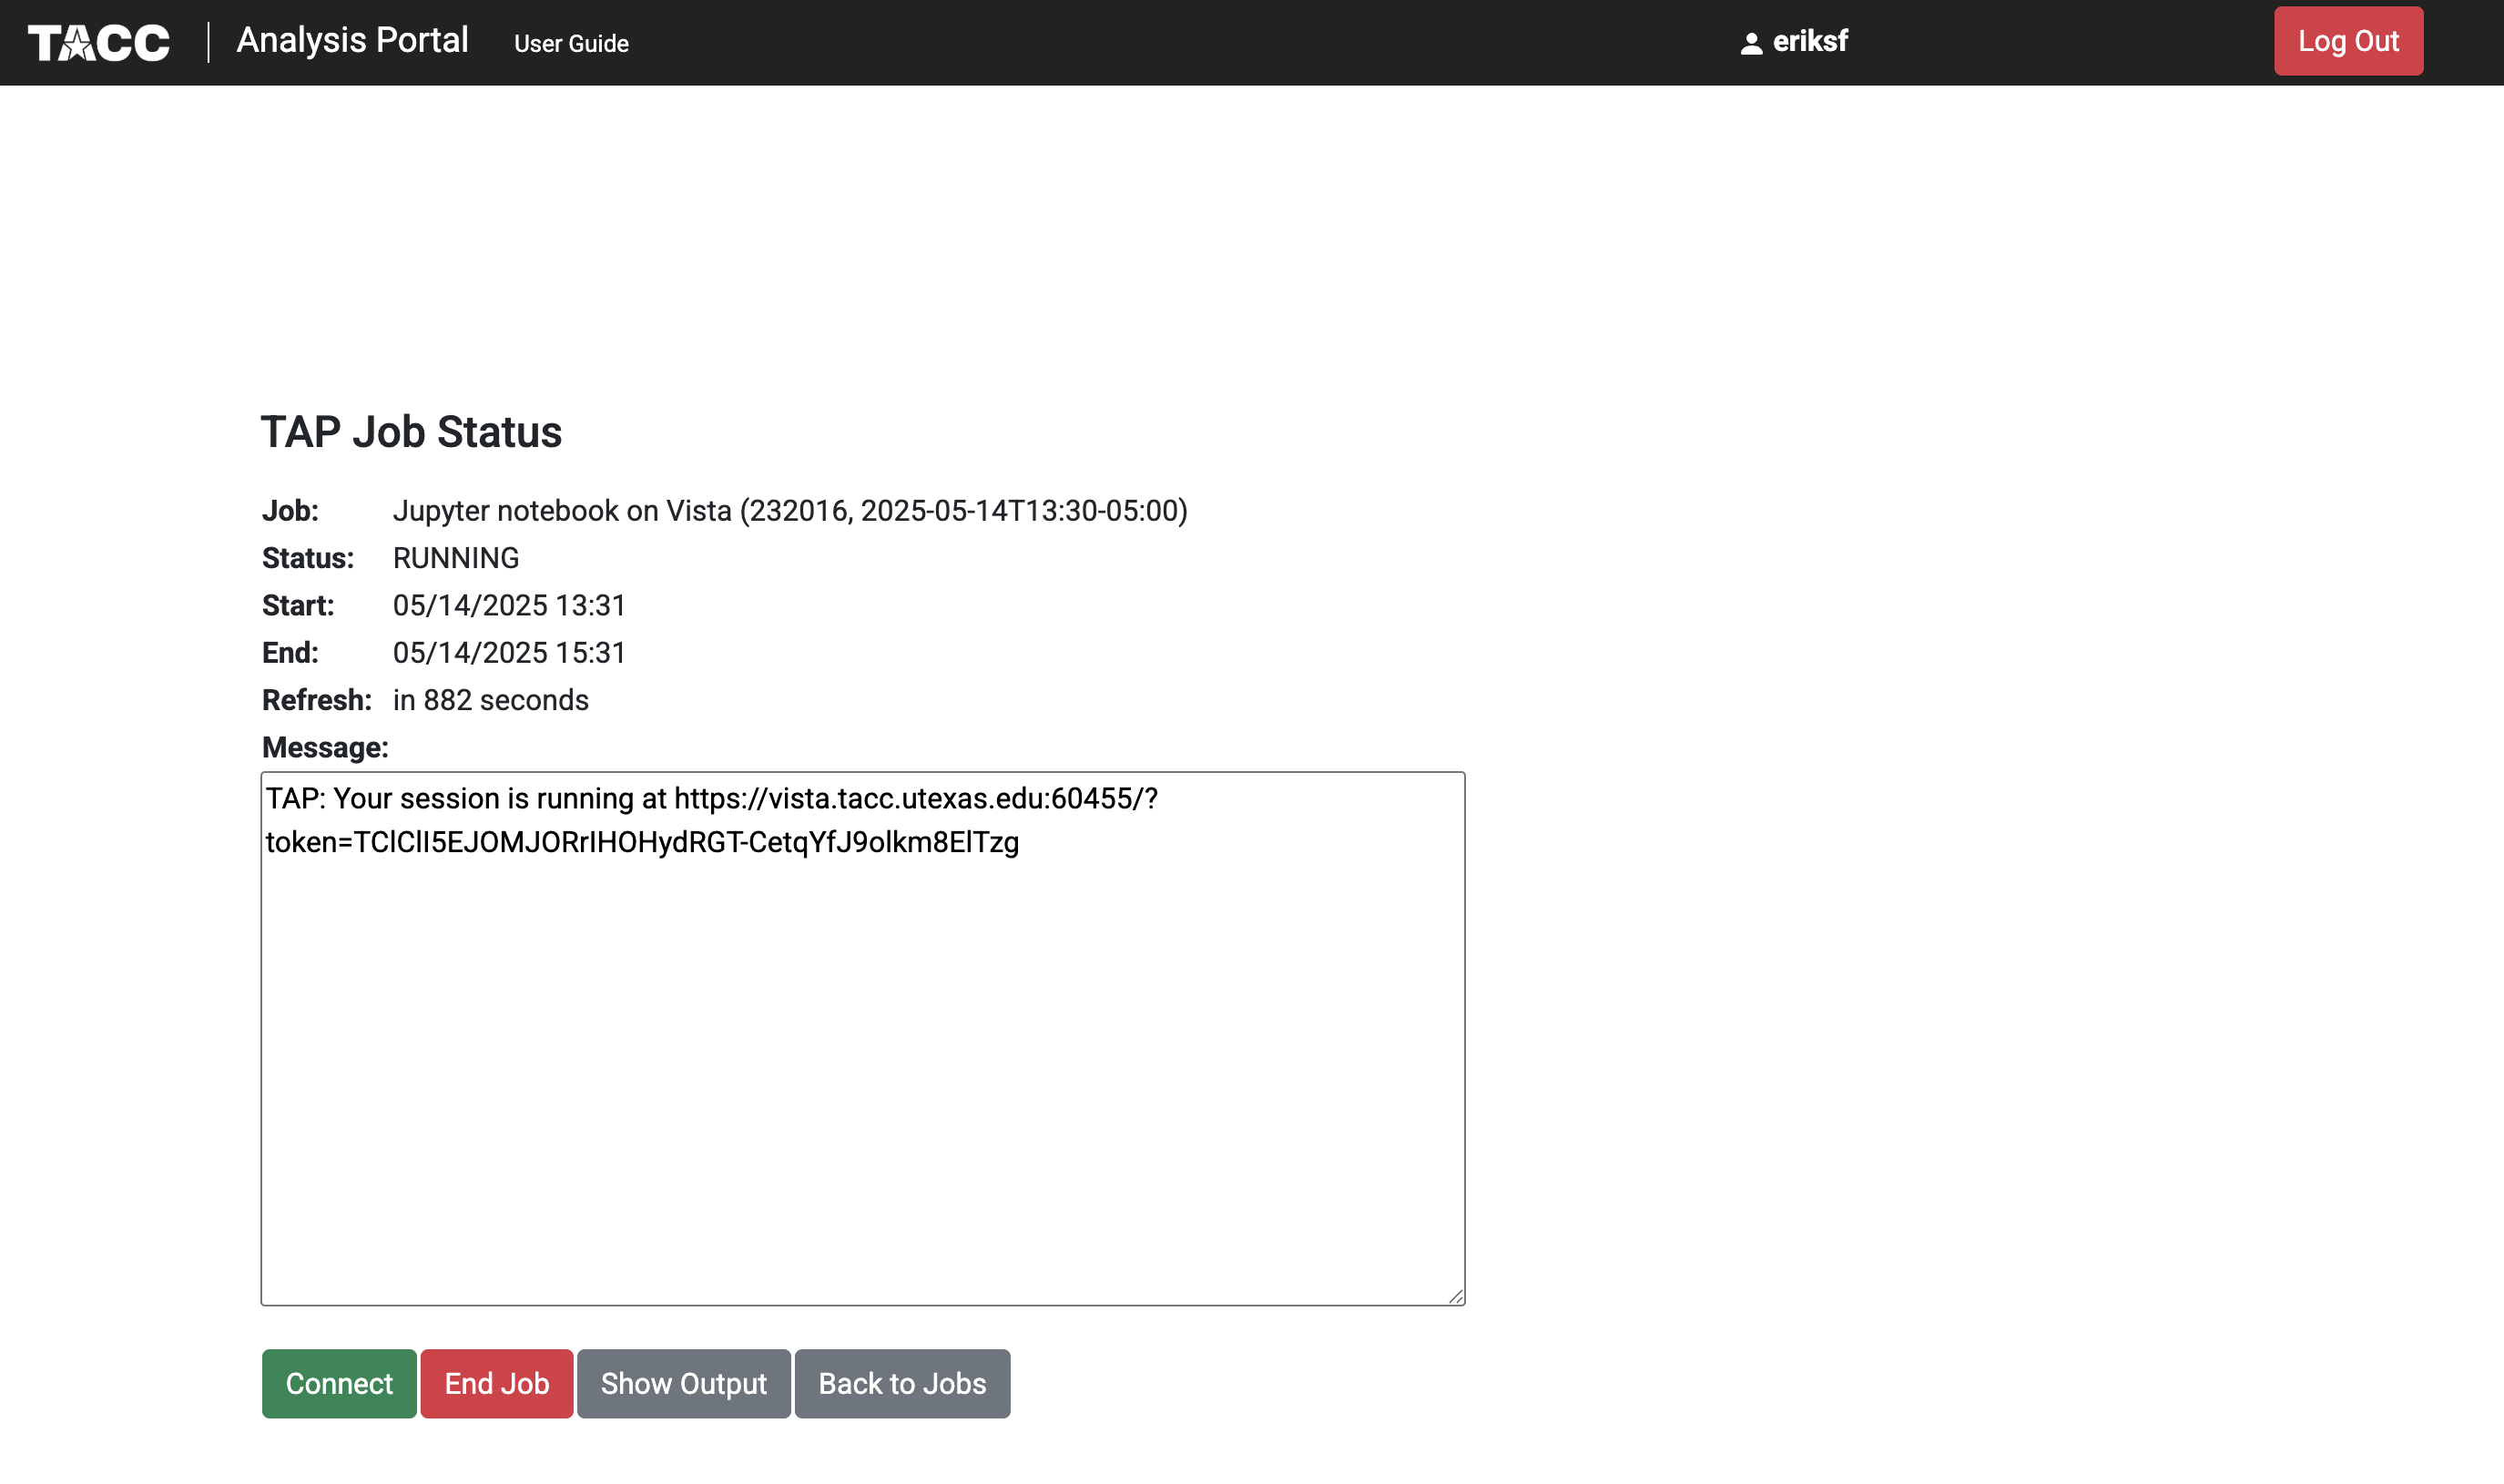
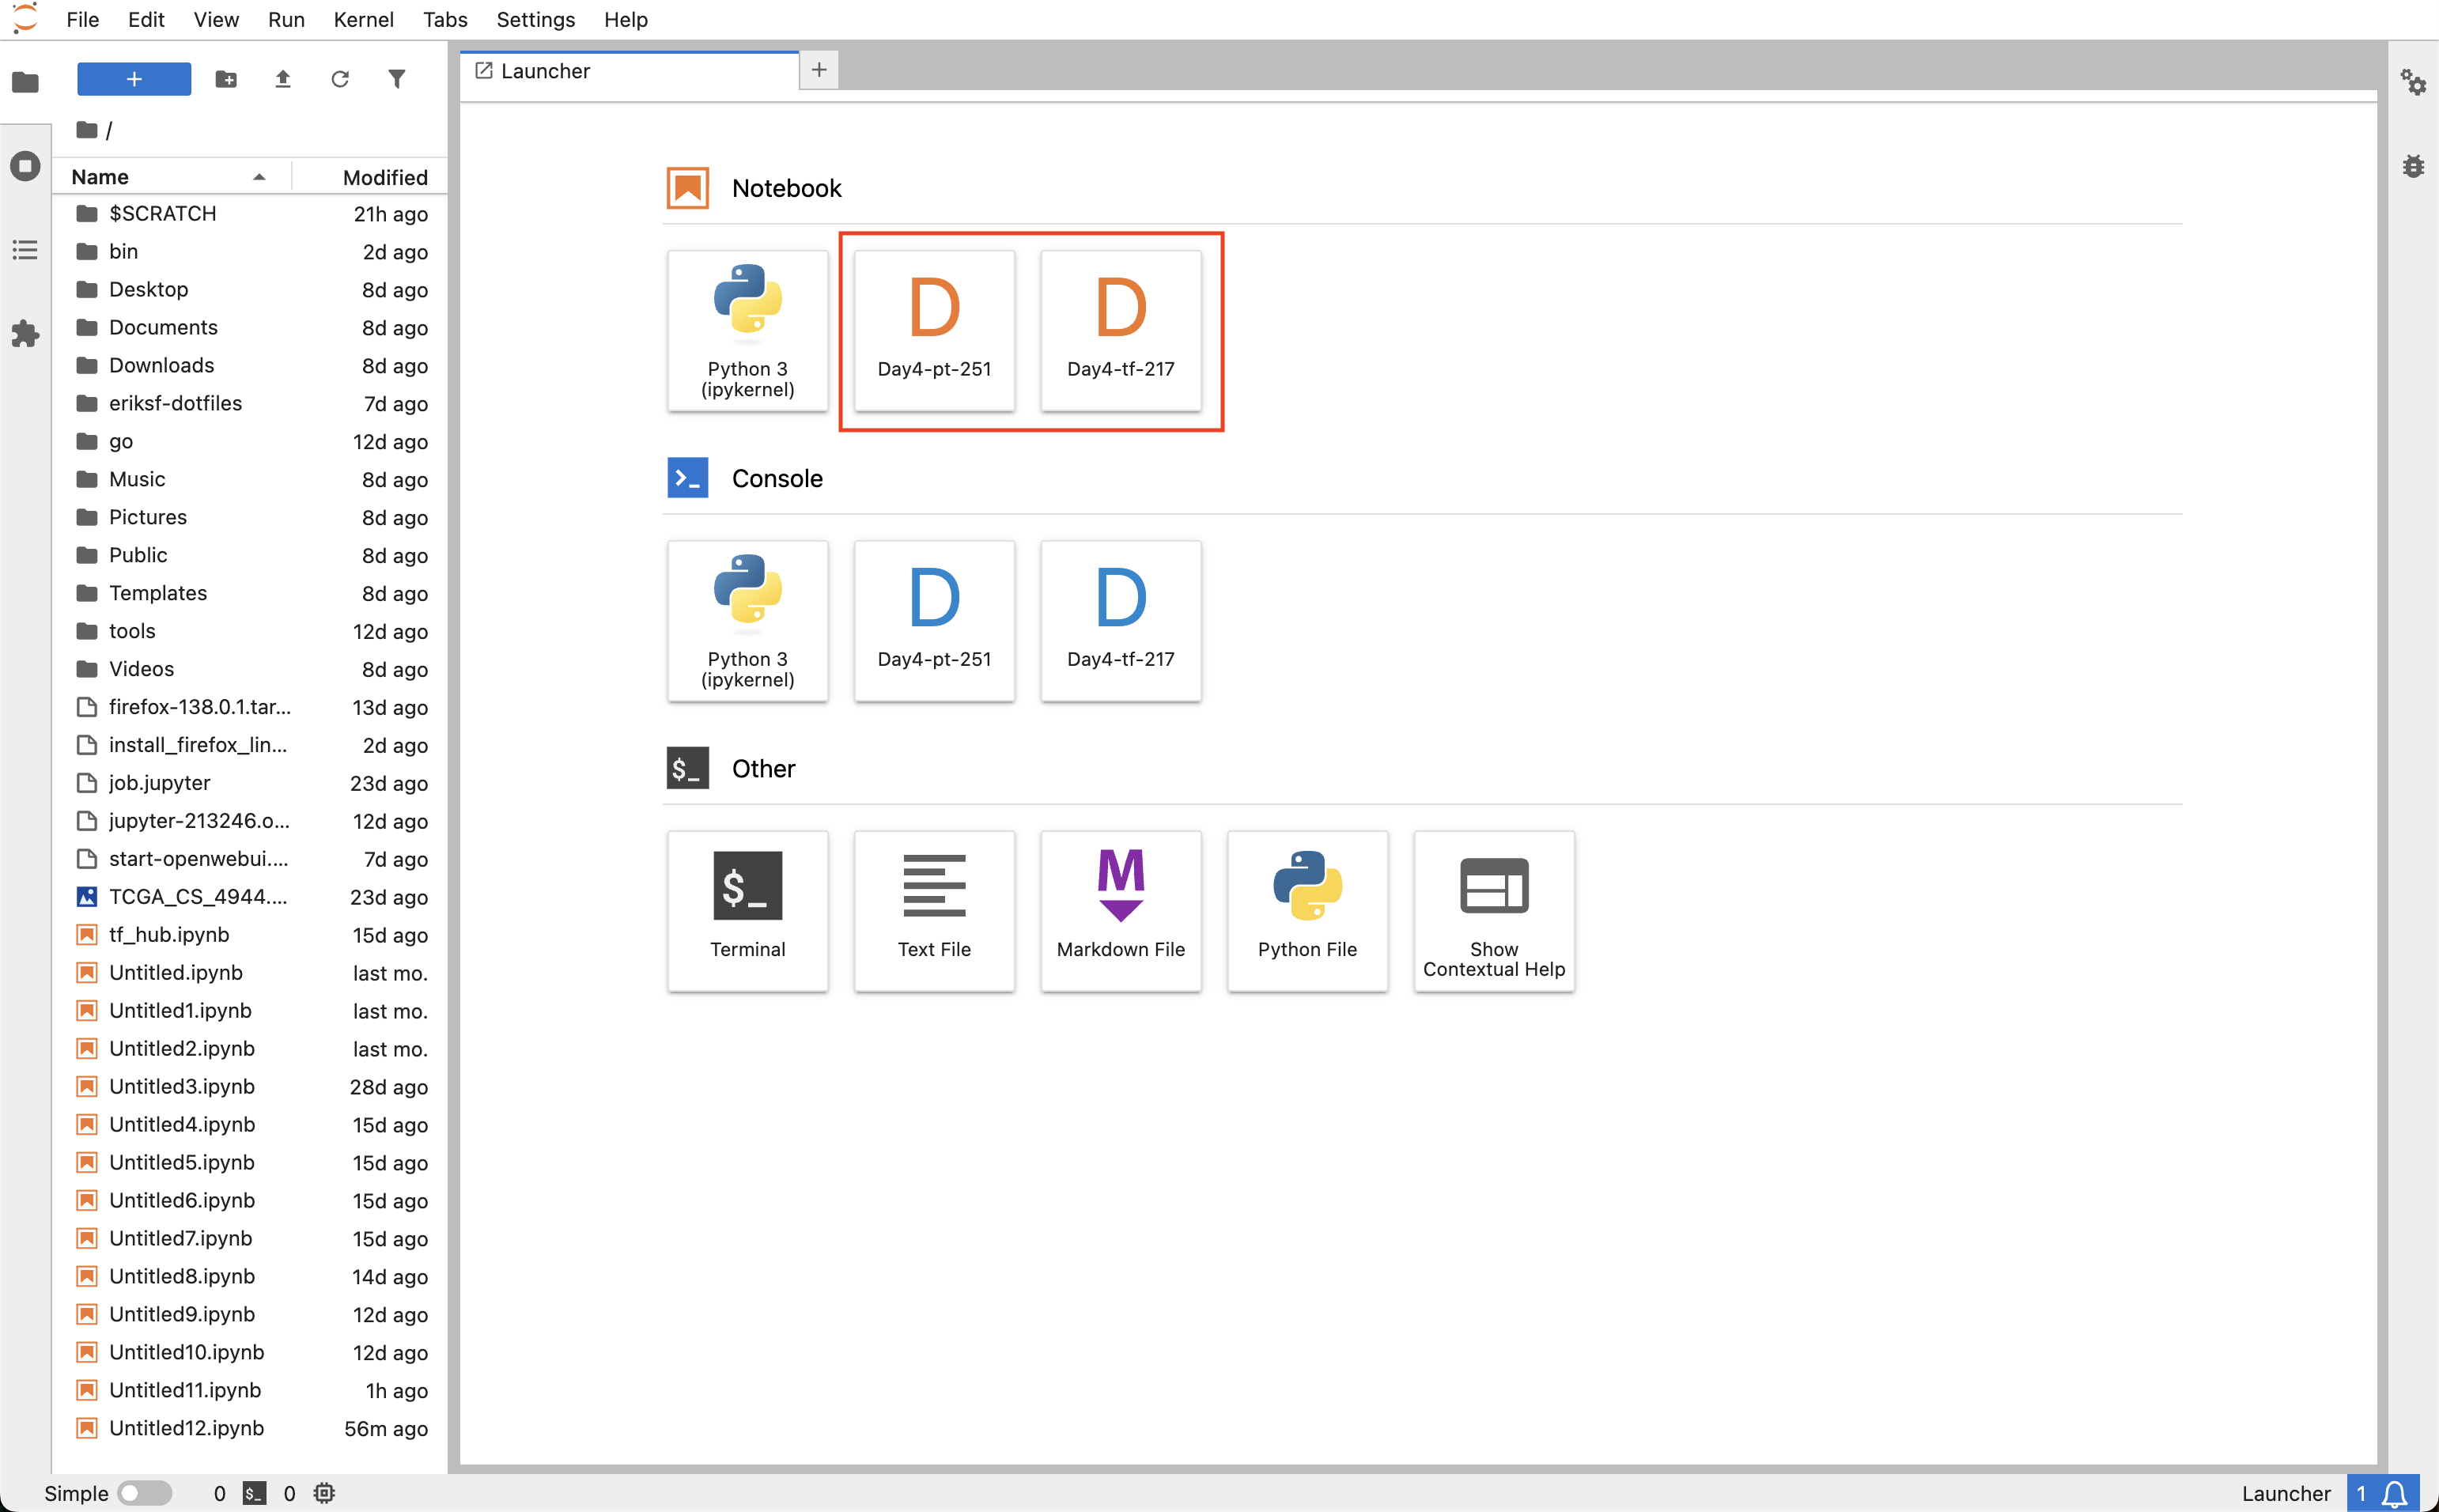
By default on Vista, the Jupyter Notebook job will open with the Jupyter Lab interface showing the user
$HOMEdirectory on the left. If the kernels are installed properly, you should see theDay4-tf-217andDay4-pt-251kernels listed in the Launcher tab under the Notebook section.
Note
If you prefer to use the classic Jupyter Notebook interface instead of Jupyter Lab, you can edit the URL in your browser to replace the word “/lab” with “/tree”.
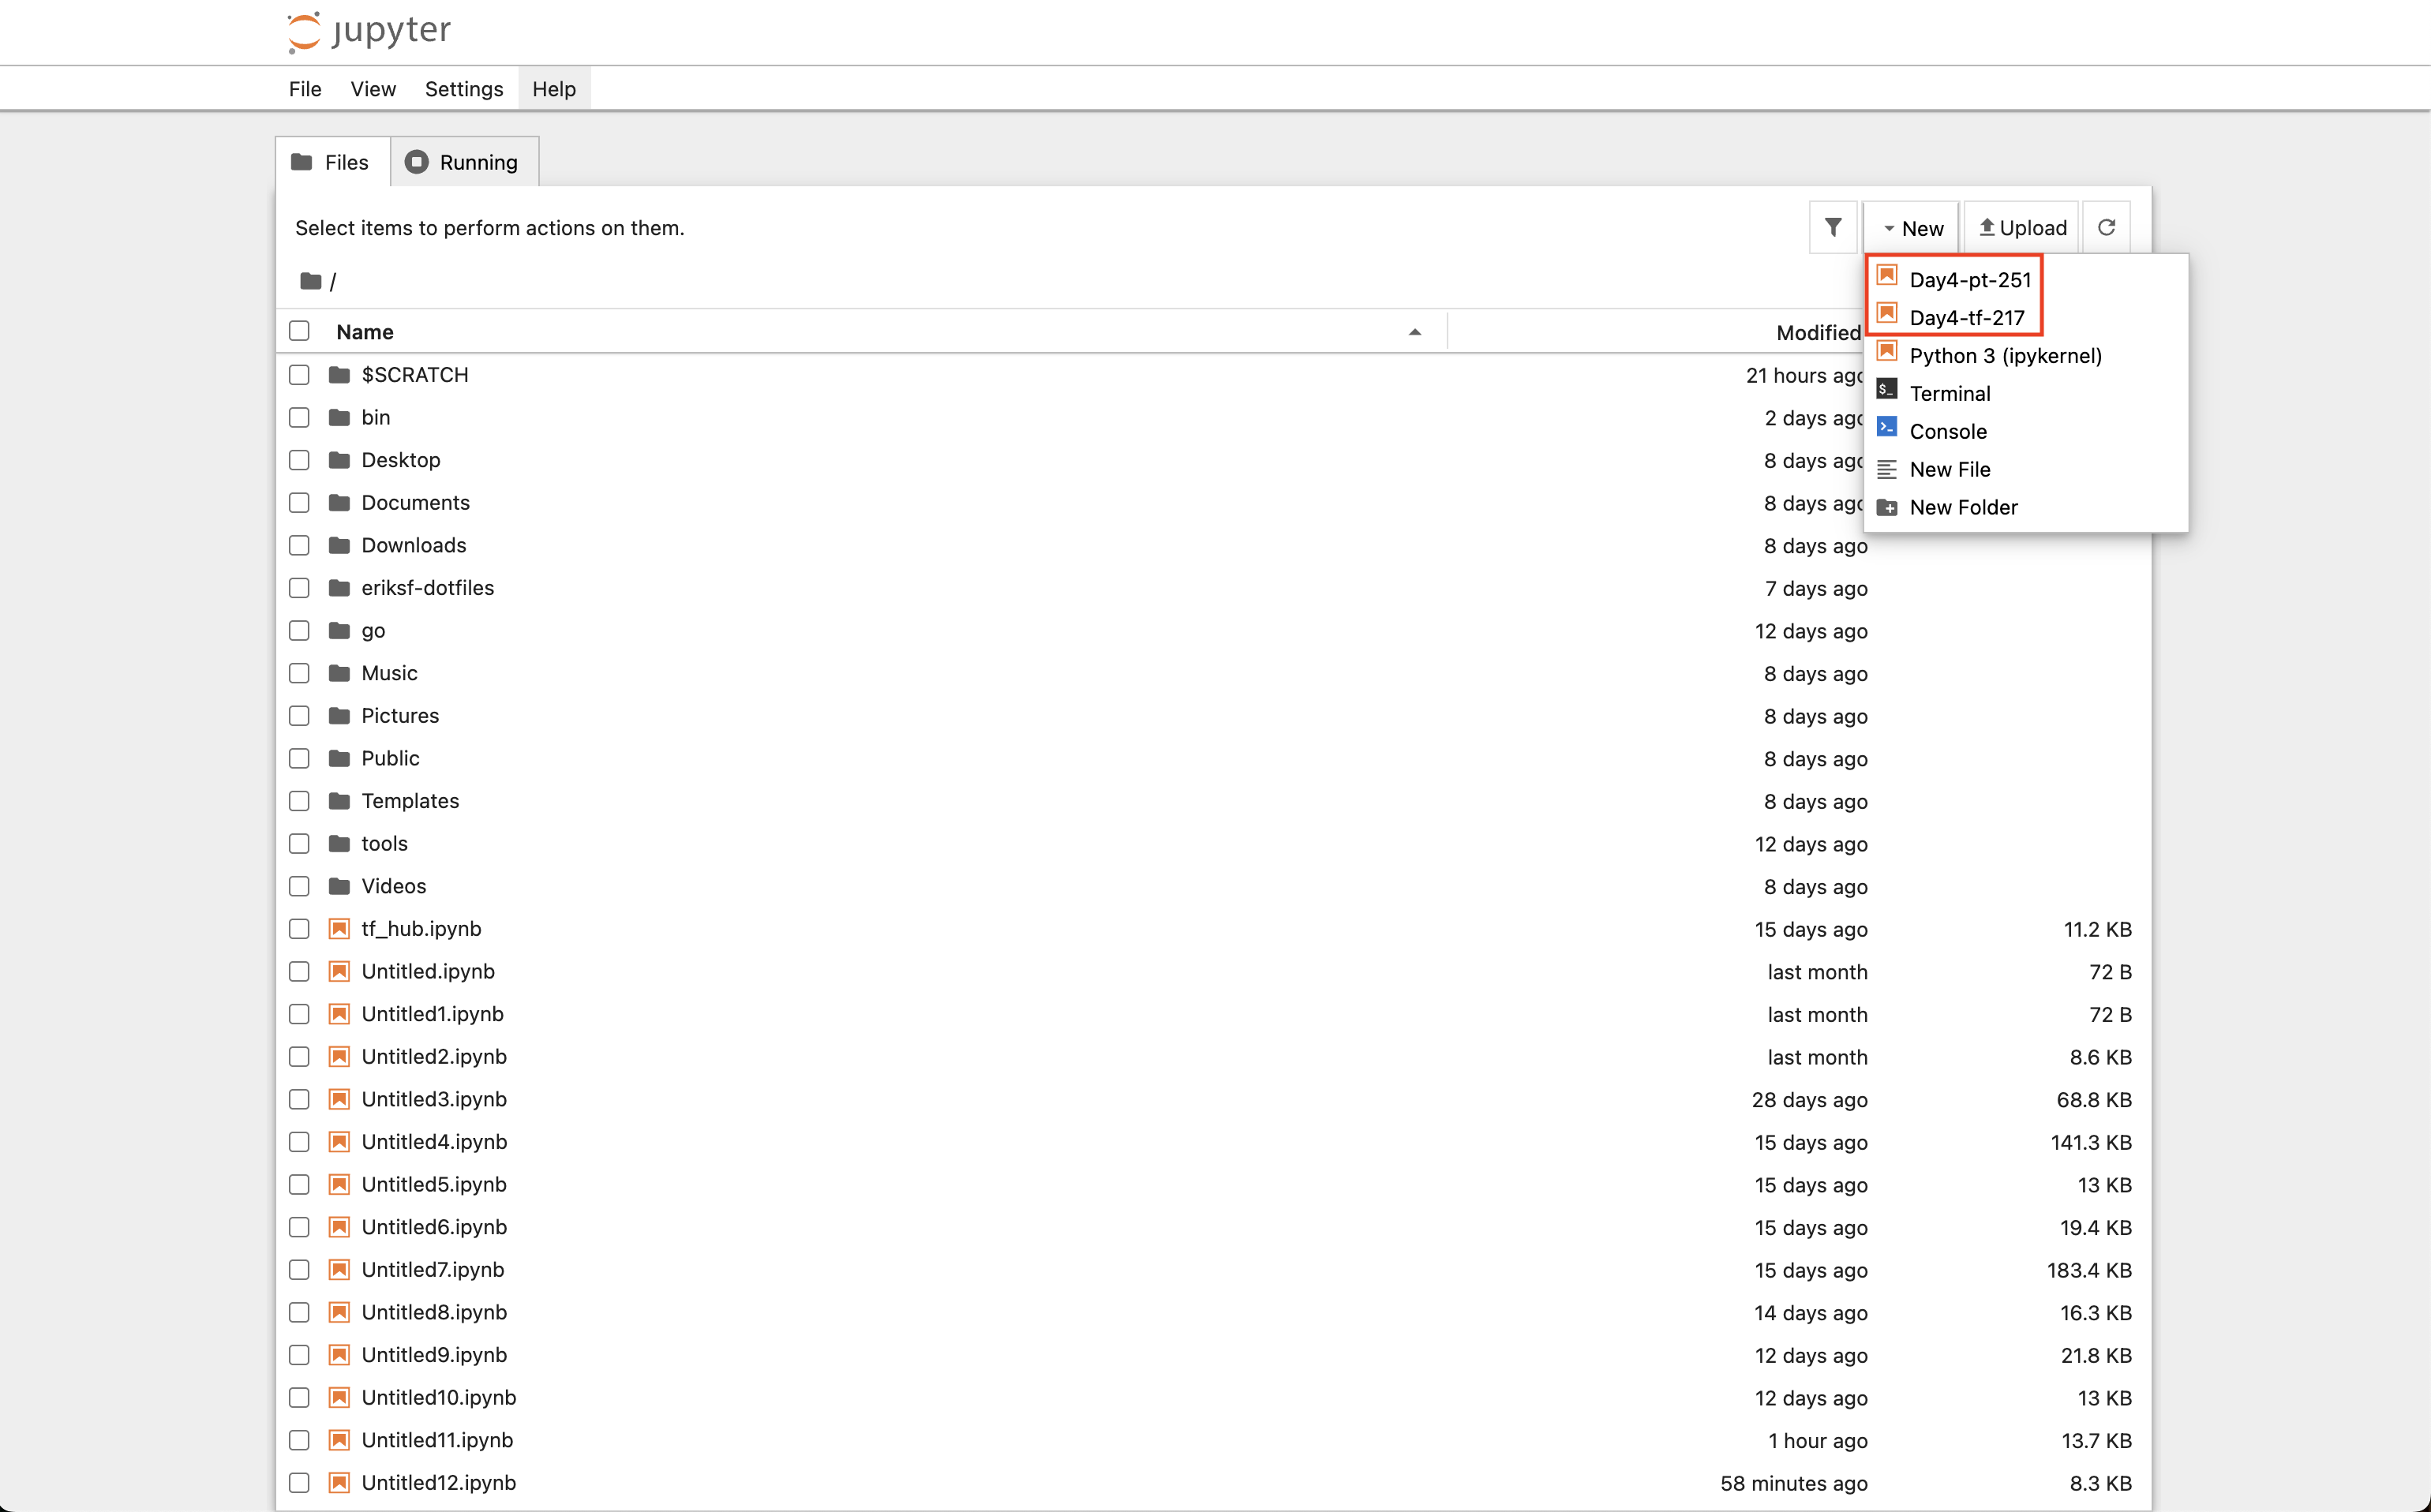
To verify that the kernels are installed properly in the Jupyter Notebook interface, click on the “New” dropdown menu in the upper right to see the
Day4-tf-217orDay4-pt-251kernels.
The Jupyter notebooks are now ready to be launched.
Note
The kernel may take a few moments to initialize on first use.